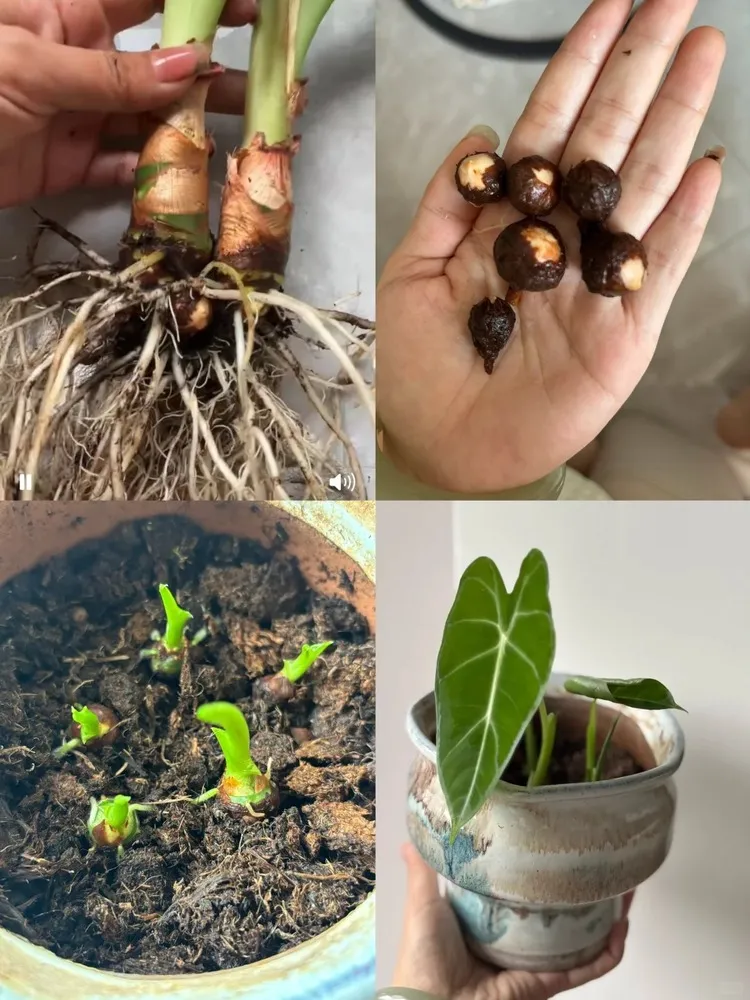
If you’ve ever pulled an Alocasia from its pot and found tiny round bulbs clinging to the roots, you’ve already seen the plant’s secret to renewal — those are corms, and they’re nature’s way of saying “I’m ready to grow again.”
Unlike many tropical plants that rely on cuttings, Alocasias are naturally built for propagation. Their thick rhizomes and underground corms constantly produce new offshoots, making division one of the most rewarding parts of keeping them. Watching a small “pup” unfurl its first leaf feels like witnessing a continuation of the same life you’ve nurtured.
But propagation isn’t always effortless.
The first time I tried to propagate my Alocasia Silver Dragon, I was too impatient — I planted immature corms straight into wet soil, and they rotted within a week.
It taught me that with Alocasia, success comes from timing, airflow, and patience — not from rushing new growth.
In this guide, we’ll explore how to propagate Alocasia using different methods — from sprouting corms to dividing mature offshoots — plus a few advanced techniques for experienced growers.
Understanding Alocasia Growth & Reproduction
To successfully propagate Alocasia, it helps to understand how these plants reproduce beneath the soil.
Alocasia doesn’t grow from a single root system — it spreads through a combination of rhizomes and corms, each serving a different purpose in the plant’s life cycle.
| Structure | Description | Function |
|---|---|---|
| Rhizome | A thick, horizontal stem growing just below the soil surface | Stores energy and connects the mother plant to offshoots |
| Corm | Small, rounded bulbs that form along the roots or rhizome | Sprout new baby plants when conditions are right |
| Offshoot / Pup | The visible mini Alocasia that grows from a corm | Can be divided and repotted once roots form |
During the active growing season, usually spring through late summer, the mother plant channels nutrients into the rhizome, producing new corms beneath the surface.
When dormancy ends or conditions warm up again, these corms awaken, sending out fresh shoots that eventually become full plants of their own.
In the wild, Alocasia often multiplies naturally this way: when heavy rain or wind loosens soil, small corms detach and settle into nearby leaf litter — a perfect, moist cradle for new growth.
If you gently unpot your Alocasia at home, you’ll often find a mix of large corms (near the base) and tiny bead-like baby corms scattered along the roots.
Those are your starting points for propagation — little promises of new life waiting for warmth and patience.
Propagating from Corms
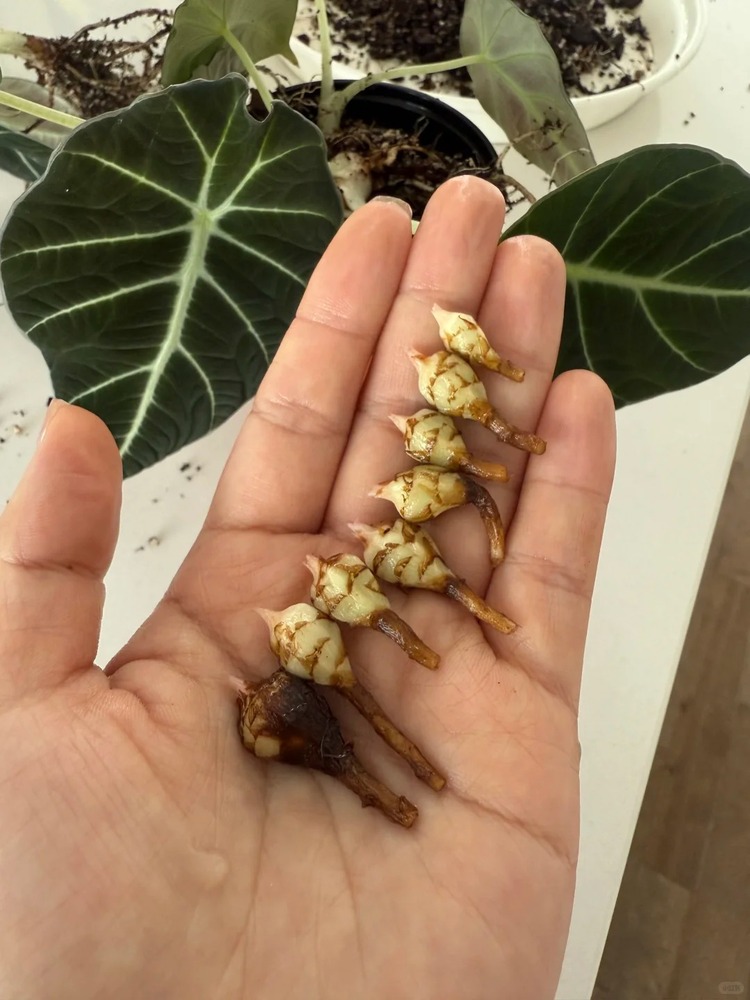
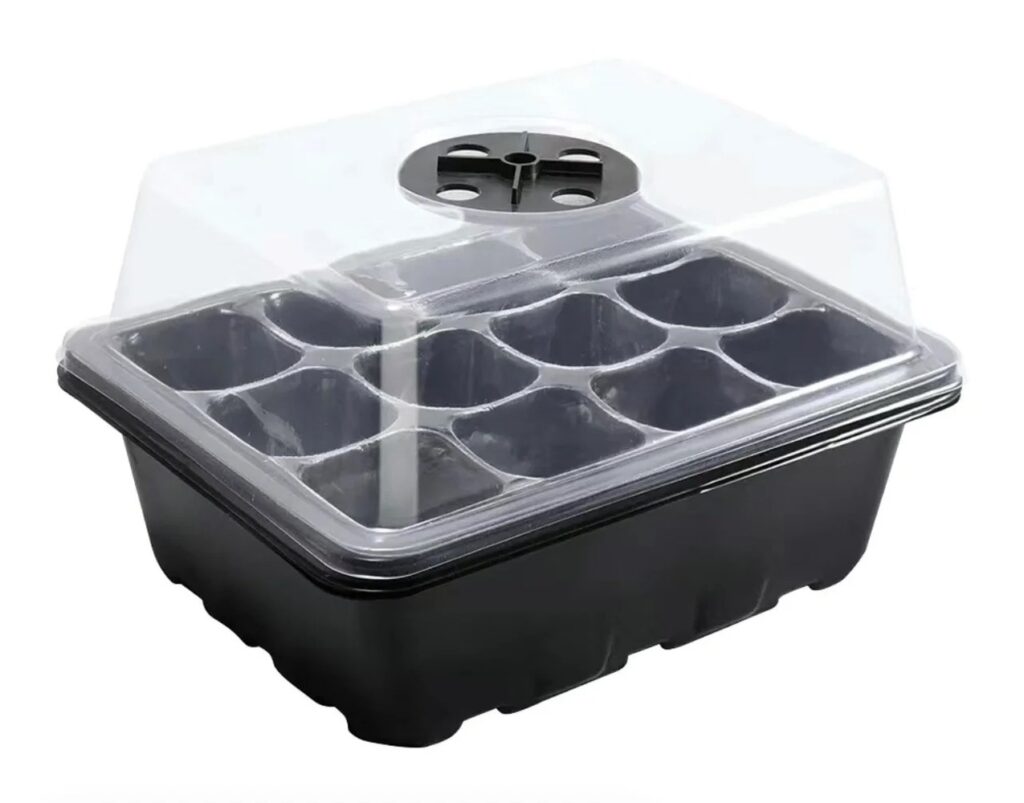
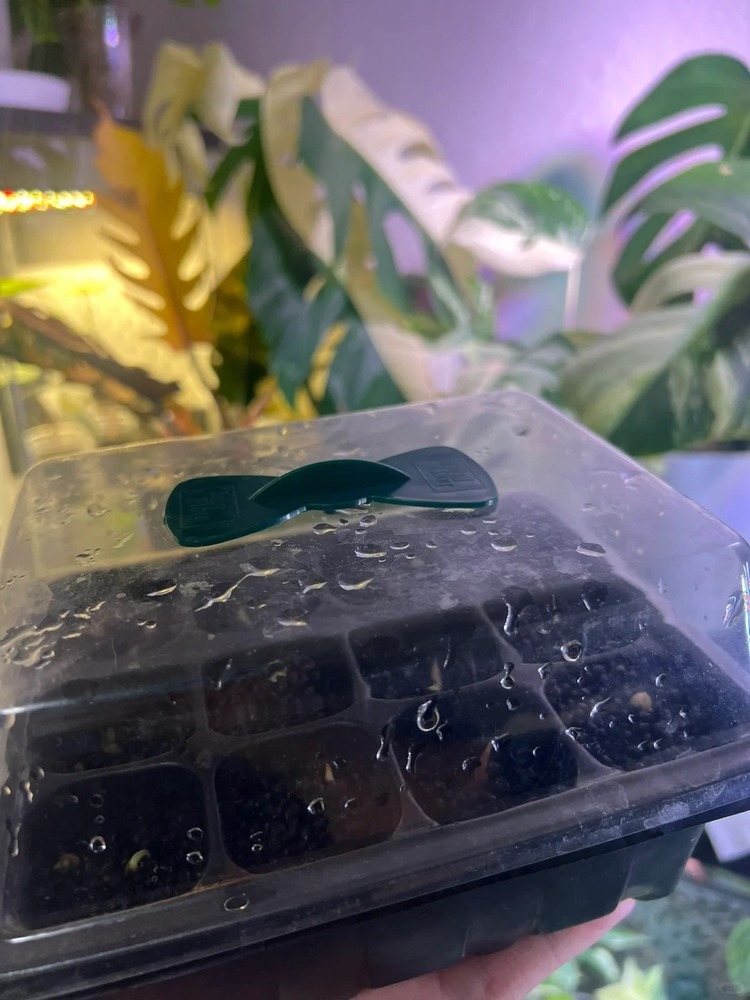
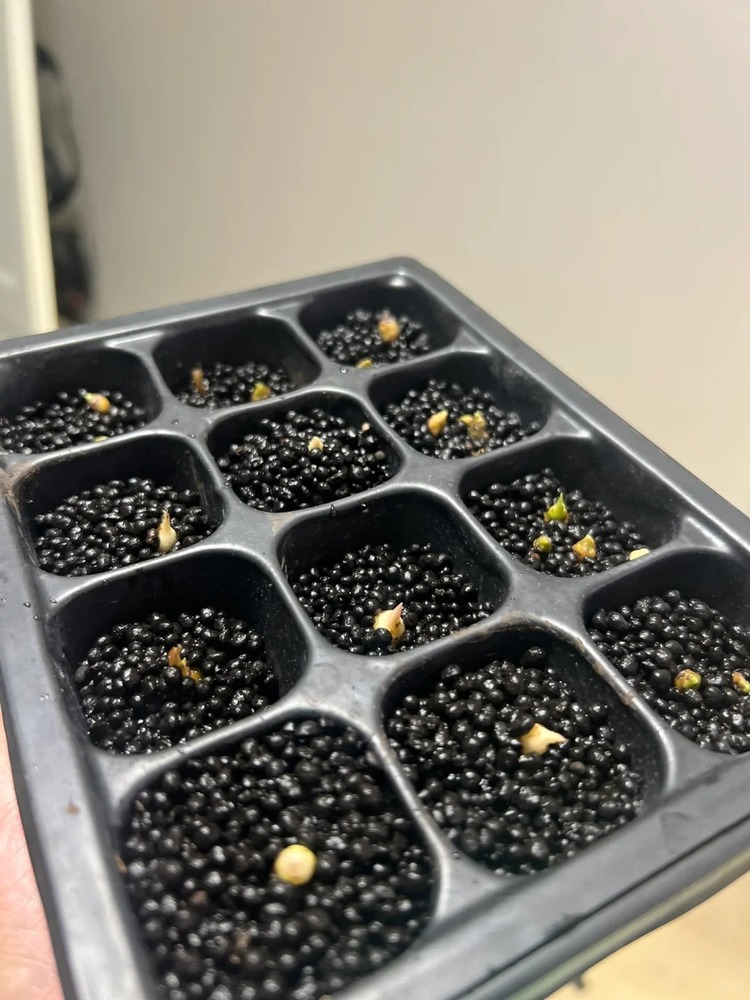
Among all methods, propagating from corms is the most exciting — and also the most delicate. Each tiny bulb you find under the soil carries the potential of a new Alocasia, but it needs the right environment to wake up safely.
1️⃣ Finding mature corms
You’ll spot them during repotting, attached to the roots or clustered near the old leaf bases. Mature corms are usually firm, round, and about the size of a pea or marble. Soft or hollow ones are better discarded.
2️⃣ Cleaning and separating
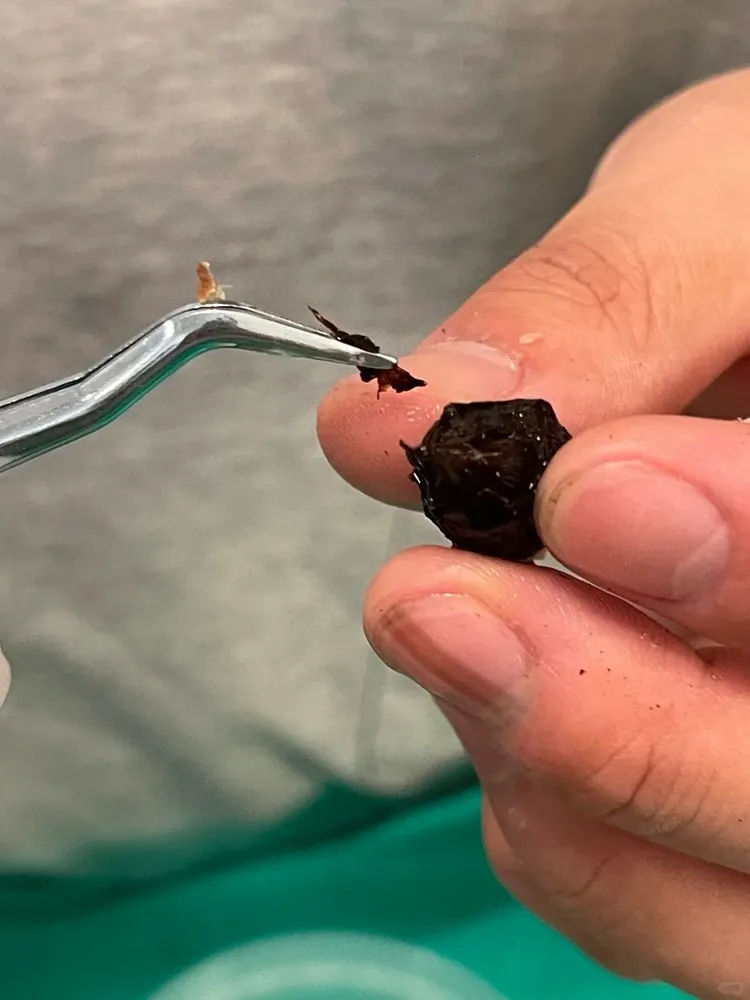
Gently remove soil using your fingers or rinse under lukewarm water. Avoid damaging the small “eye” — that’s the growth point where your new shoot will emerge. If multiple corms are tangled in roots, twist slightly rather than cutting.
3️⃣ Sprouting methods (Dry vs. Moist Start)
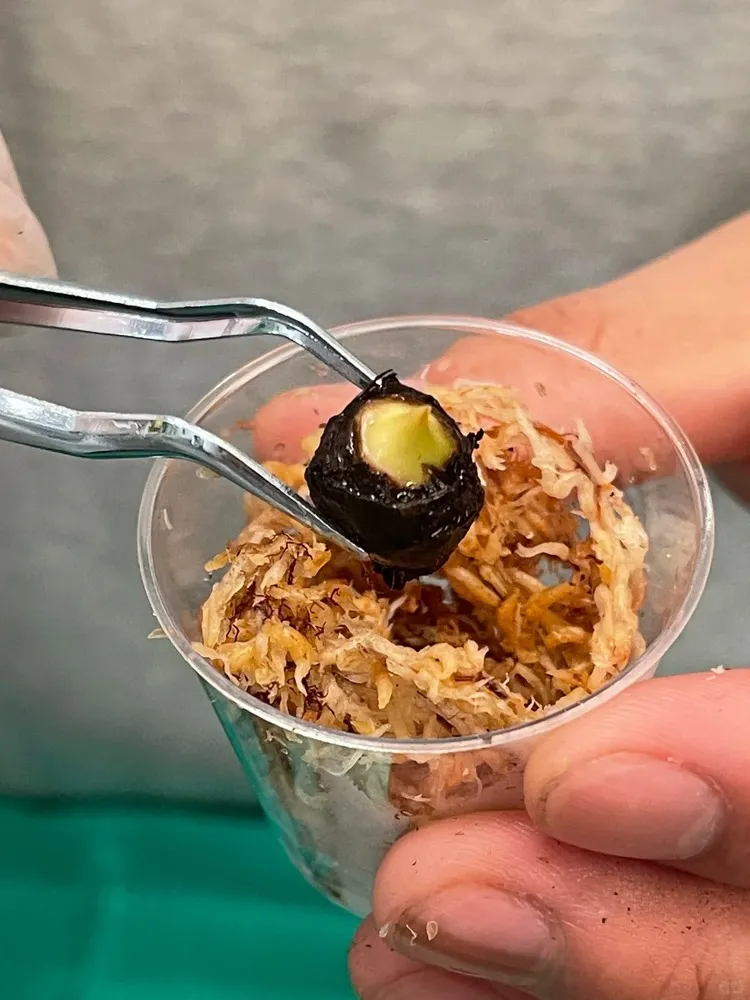
- Moist Start: Place the corms in damp sphagnum moss or perlite, then seal them in a ventilated box or clear cup.
- Water Start: Some growers prefer half-submerging corms in shallow water — just enough to keep them moist, not drowned.
Both methods work, but moss gives better airflow and lowers rot risk.
4️⃣ Light & humidity control
Keep them warm — ideally 20–28°C (68–82°F) — with bright, indirect light. A humidity dome or plastic lid helps retain moisture, but open it daily for air exchange.
5️⃣ When roots and shoots appear
In the right conditions, you’ll see tiny roots and a green sprout in 2–4 weeks. Once the shoot reaches about 2–3 cm and roots have branched, you can transfer it into soil.
💬 Personal note:
Here in Portland, winters are cold and damp, so I start my corms in moist sphagnum moss instead of soil. It gives them a gentle, breathable start — once I see roots forming, I move them into a potting mix to avoid waterlogging.
🌱 Each corm you wake is a quiet victory — proof that patience and warmth can bring life back from beneath the soil.
Propagating from Offshoots (Division Method)
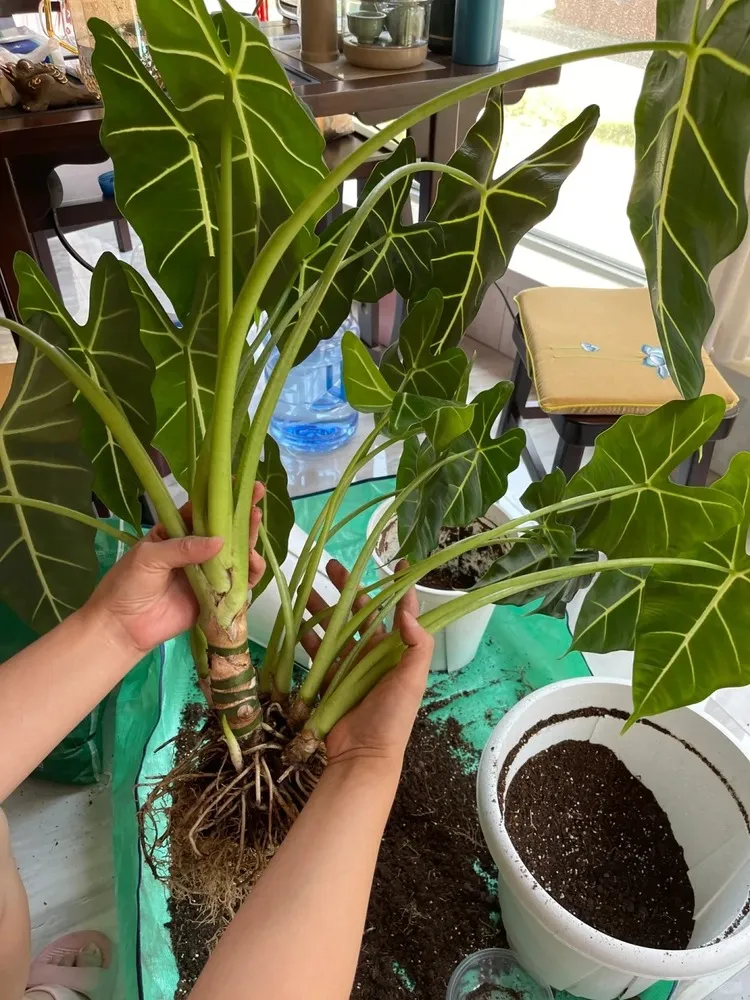
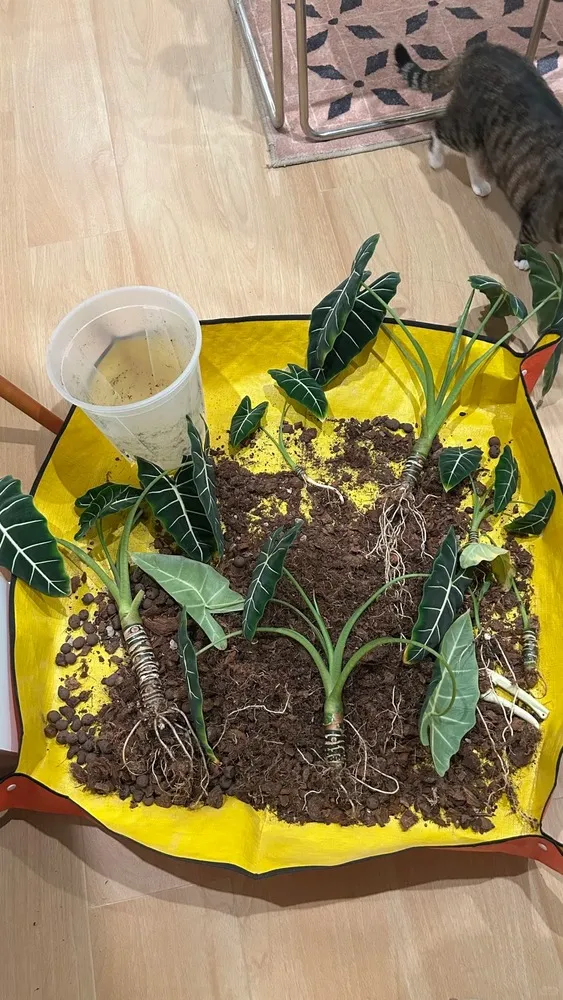
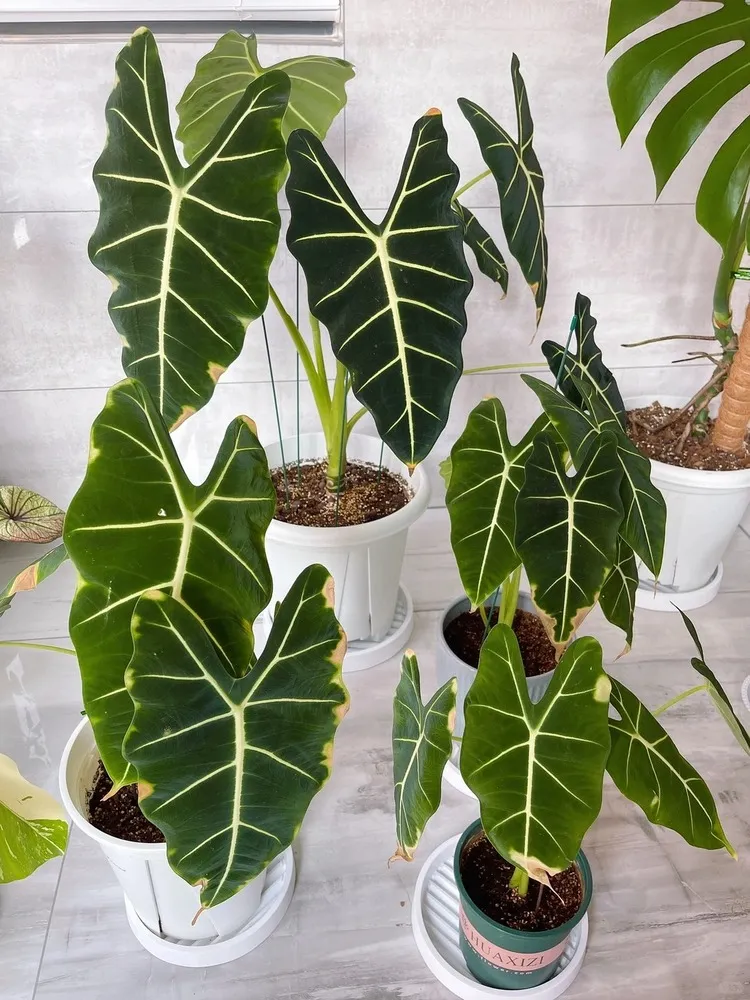
If your Alocasia has grown a cluster of smaller plants around its base, you’ve got offshoots — or “pups.” These are mini versions of the mother plant that can be divided and grown on their own. Division is the safest and fastest way to get a mature new Alocasia.
1️⃣ How to know when an offshoot is ready
Don’t rush to separate tiny pups. Wait until the offshoot has at least 2–3 leaves and its own root system visible through the soil. If it’s still relying on the mother plant’s rhizome, give it more time to develop strength.
2️⃣ Separation steps
Unpot the plant carefully and remove excess soil to expose the connecting roots.
Use clean, sharp scissors or a sterilized knife to cut between the mother and pup — follow the natural division line where their roots diverge.
If the cut surface is large, dust it with sulfur powder or cinnamon to prevent infection.
3️⃣ Potting mix
Plant the separated pup in a slightly looser version of the mother’s soil mix — something airy and moist but not dense.
This encourages root expansion while minimizing transplant shock.
4️⃣ Light and humidity during recovery
Keep the new division in bright, indirect light and maintain high humidity (60–80%) for the first 2 weeks.
Avoid direct sunlight and strong wind; you can loosely cover it with a clear dome or plastic bag for a mini greenhouse effect.
5️⃣ Timing
Spring is the best season for division — when the plant is waking from dormancy and ready to produce new roots.
Avoid dividing during late autumn or winter when growth slows.
💡 E-E-A-T Tip:
If possible, include a photo or short video showing your mother plant, the attached offshoot, and the separated pup after repotting.
Visual documentation not only demonstrates authenticity but also helps readers understand the process step by step.
🌱 Each offshoot carries your plant’s legacy — division is simply the art of letting it continue its own story.
Other Methods — Rare but Possible
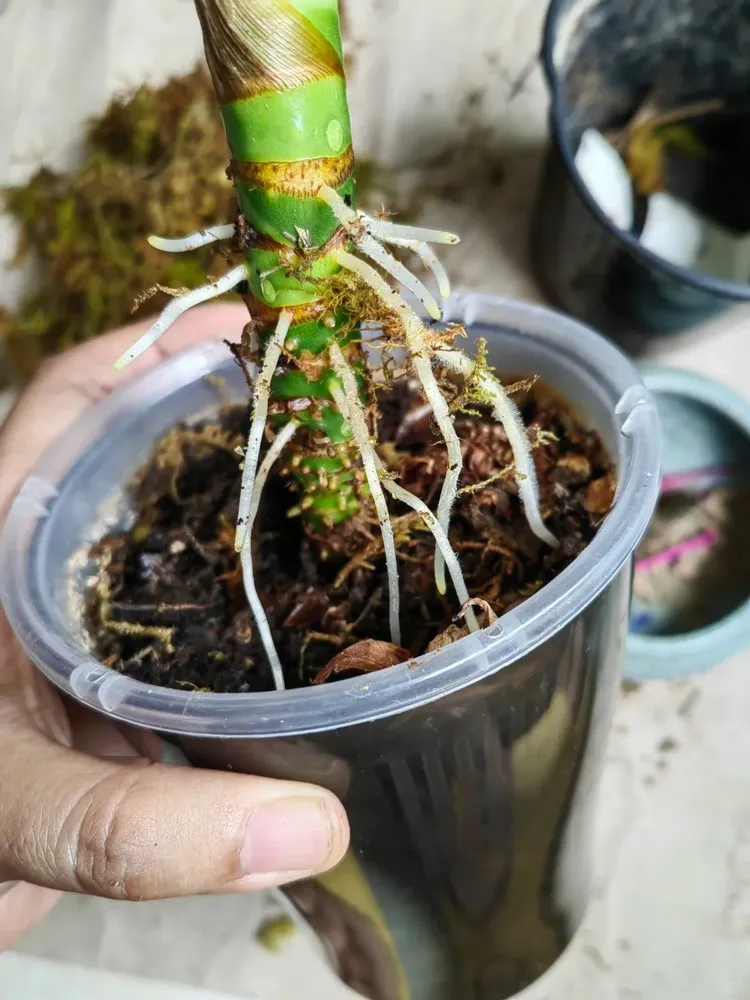
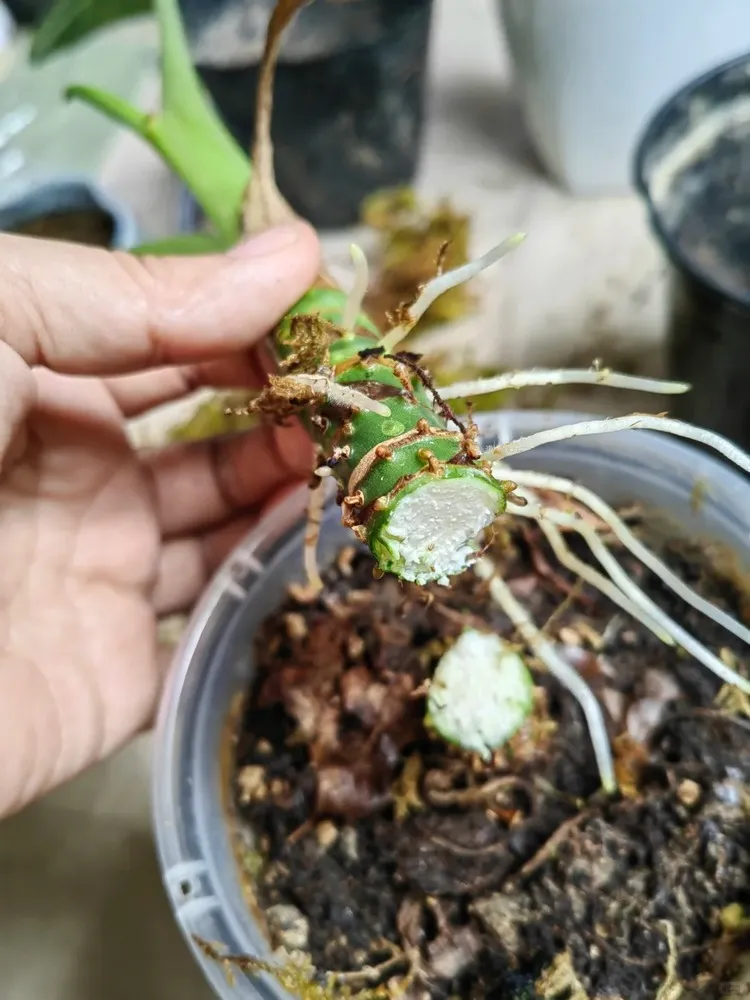
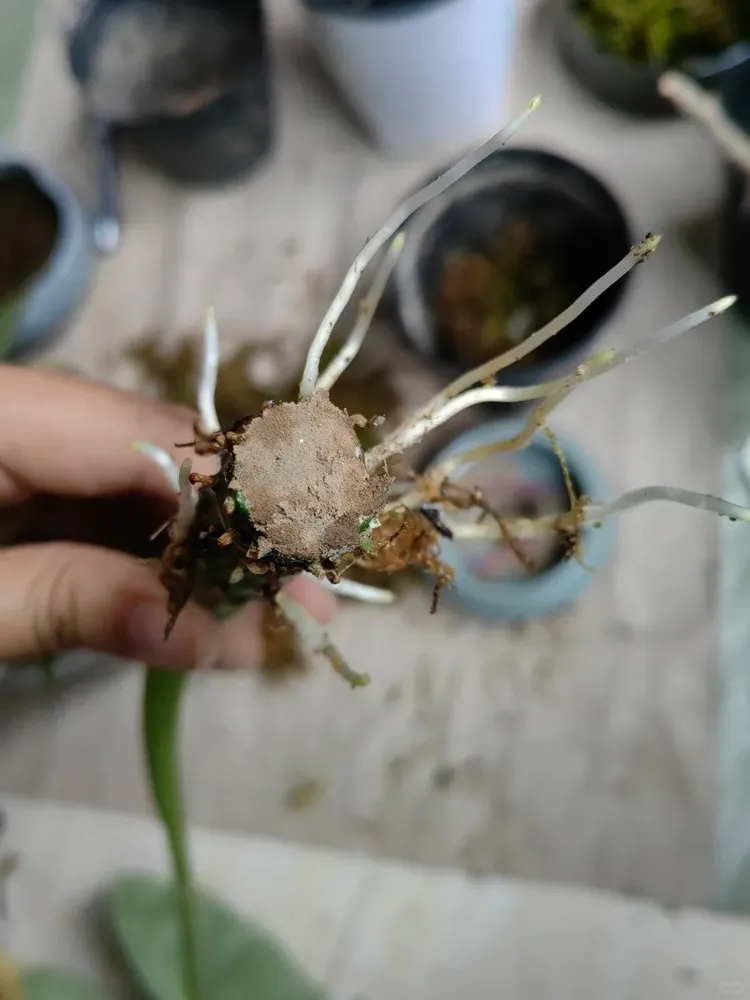
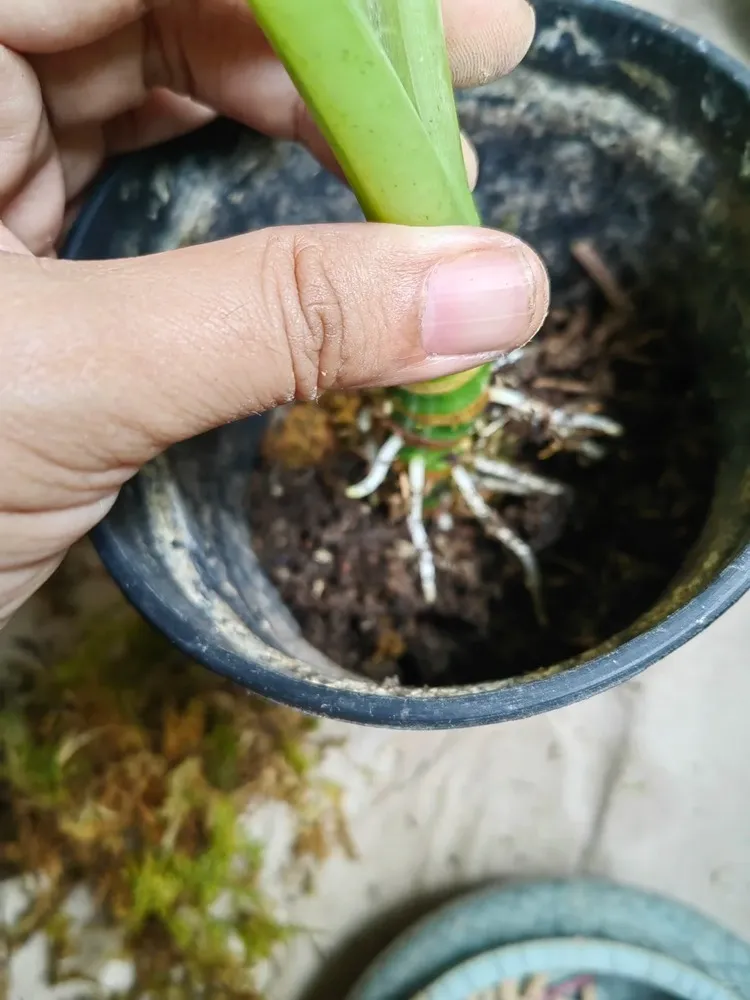
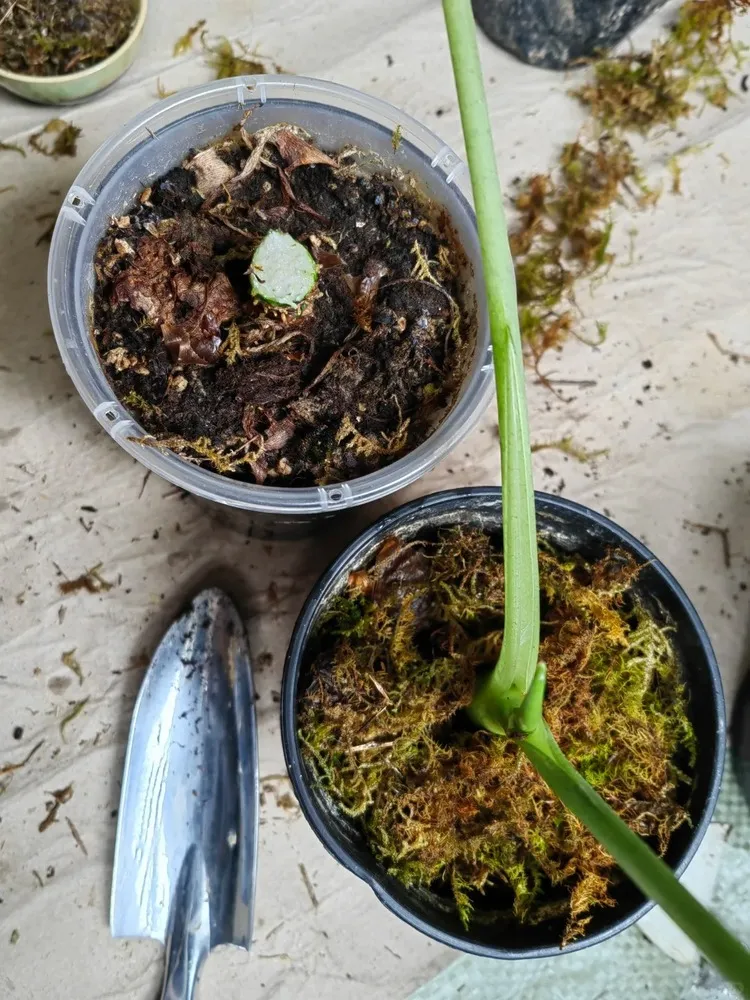
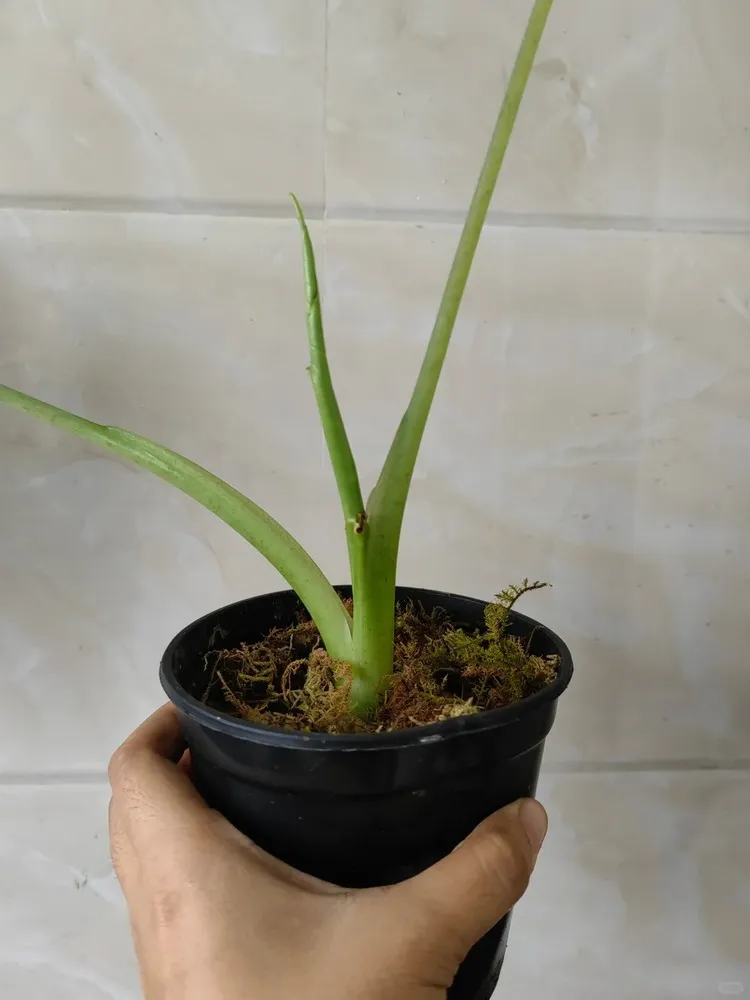
While most Alocasia plants are propagated through corms or offshoots, some mature specimens — especially those with thick, woody stems — can also be multiplied through stem cutting or top division.
This method works best for older Alocasias (“old stumps”) that have outgrown their pots or lost lower leaves.
How it works:
1️⃣ Cut the top section of the stem, leaving several nodes and at least one healthy leaf.
2️⃣ Reduce the number of leaves — this helps the plant focus energy on growing new roots instead of sustaining foliage.
3️⃣ The remaining stump will usually push out new buds or offsets from the nodes, effectively turning one plant into two.
4️⃣ Treat the cut surface with a healing agent or anti-fungal paste (for example, red lime solution or a standard horticultural wound sealant) to prevent infection and rot.
💬 Note:
This “top cutting” method can also work with other Aroid family members, including Philodendron and Anthurium, though success depends heavily on humidity, warmth, and airflow.
🌱 It’s a slower, riskier technique — but it can rejuvenate an aging Alocasia and produce entirely new growth from the base.
Aftercare — Helping New Growth Thrive
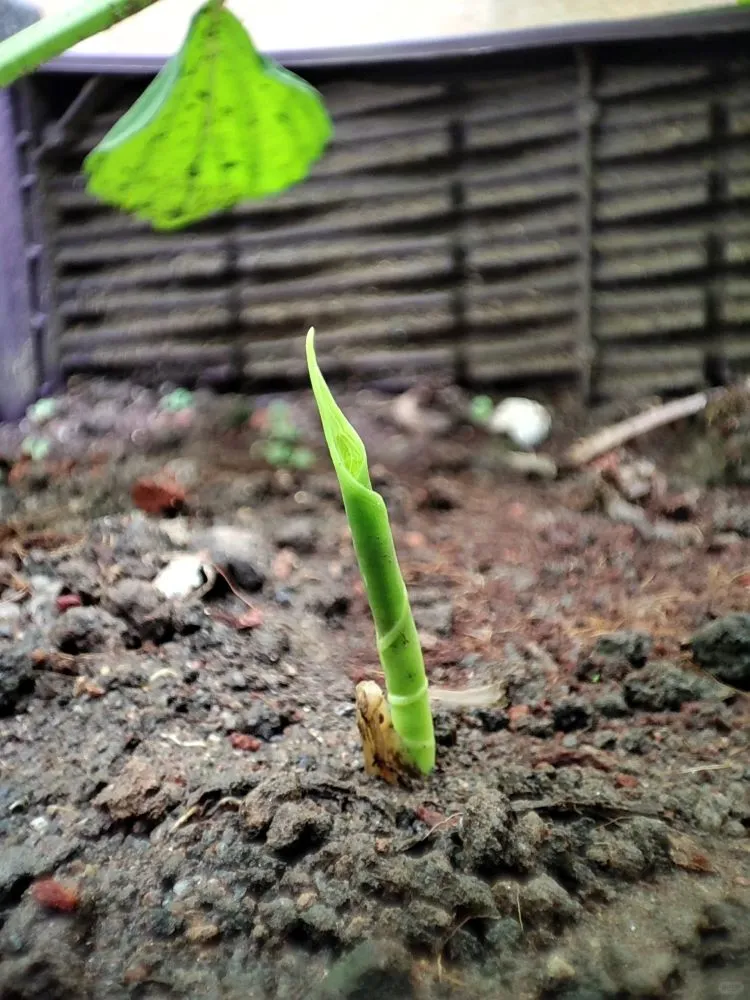
Once your new Alocasia roots have started forming, the real care begins.
Young plants are fragile — their roots are still tender, and their first leaves are adjusting to their new environment. The goal now is stability, not speed.
Light & Humidity
Provide bright but indirect light, similar to what mature Alocasias prefer.
Too much sun can scorch soft leaves; too little, and growth stalls.
Keep humidity around 70–80%, either with a mini greenhouse dome or a transparent container.
This creates a stable, moist microclimate that prevents dehydration.
Watering
Keep the substrate lightly moist — never soaked.
Corms and offshoots can easily rot if the mix stays too wet.
If condensation builds up inside your dome, open it daily to allow fresh air exchange.
Fertilizer
Wait until you see at least one or two firm new leaves before introducing fertilizer.
Start with a diluted nitrogen-rich feed (¼ strength) to encourage leaf and root expansion.
Gradually increase strength as the plant stabilizes over several weeks.
Common Mistakes to Avoid
- Potting too early: Planting before roots are fully formed can cause the corm to collapse.
- Poor airflow: Leads to rot even if the soil seems fine.
- Excessive sunlight: Young leaves are sensitive and burn easily.
💬 Author’s Note:
The first time I propagated Alocasia corms, I rushed to pot them up as soon as I saw a sprout.
The roots weren’t ready yet — within a week, the bulb softened and died.
Now, I wait until roots are at least 2–3 cm long before planting. That patience makes all the difference.
🌿 Propagation doesn’t end when roots appear — it begins when they learn to breathe in real soil.
My Real Results — Propagation Log
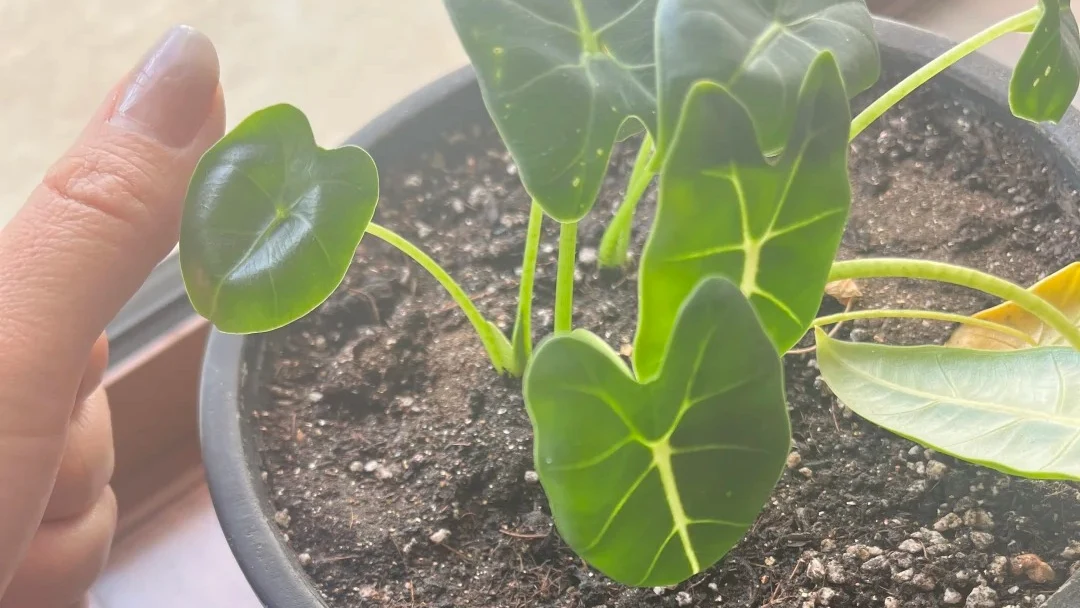
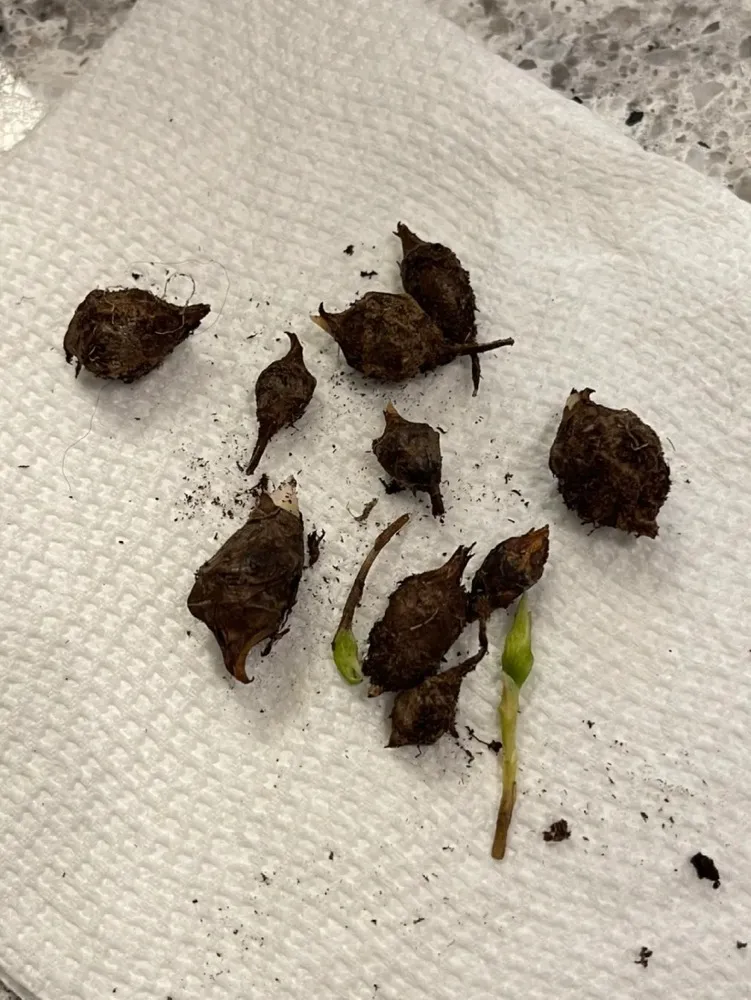
In late summer, I decided to document my own Green Velvet Alocasia (A. reginula) propagation journey — from a single “egg-like” corm to five healthy plants.
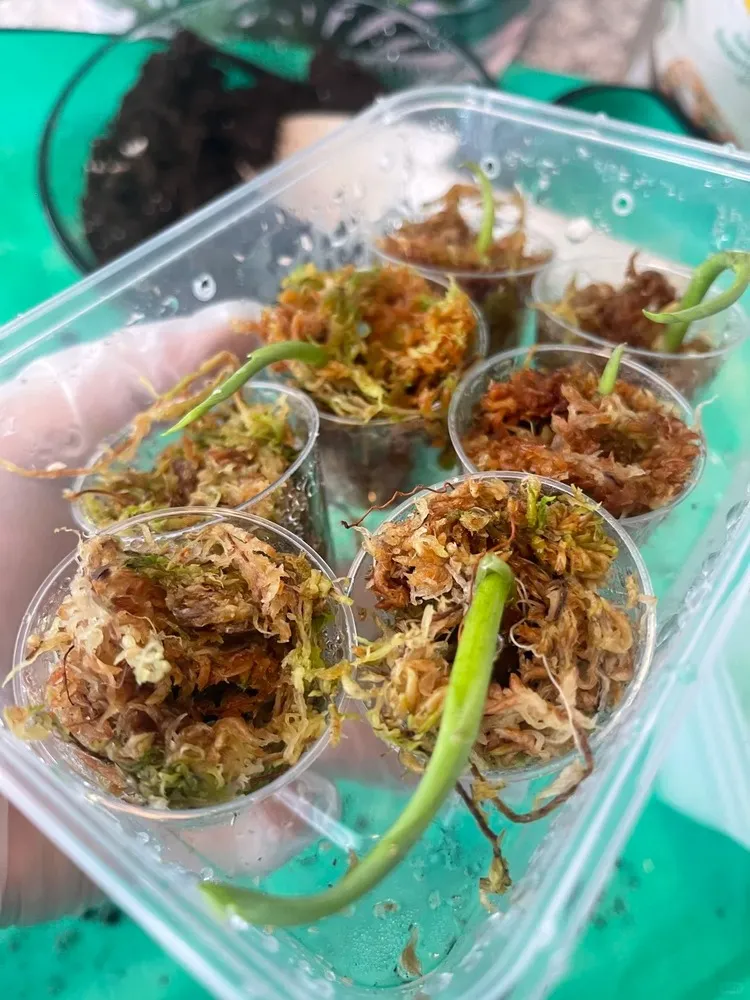
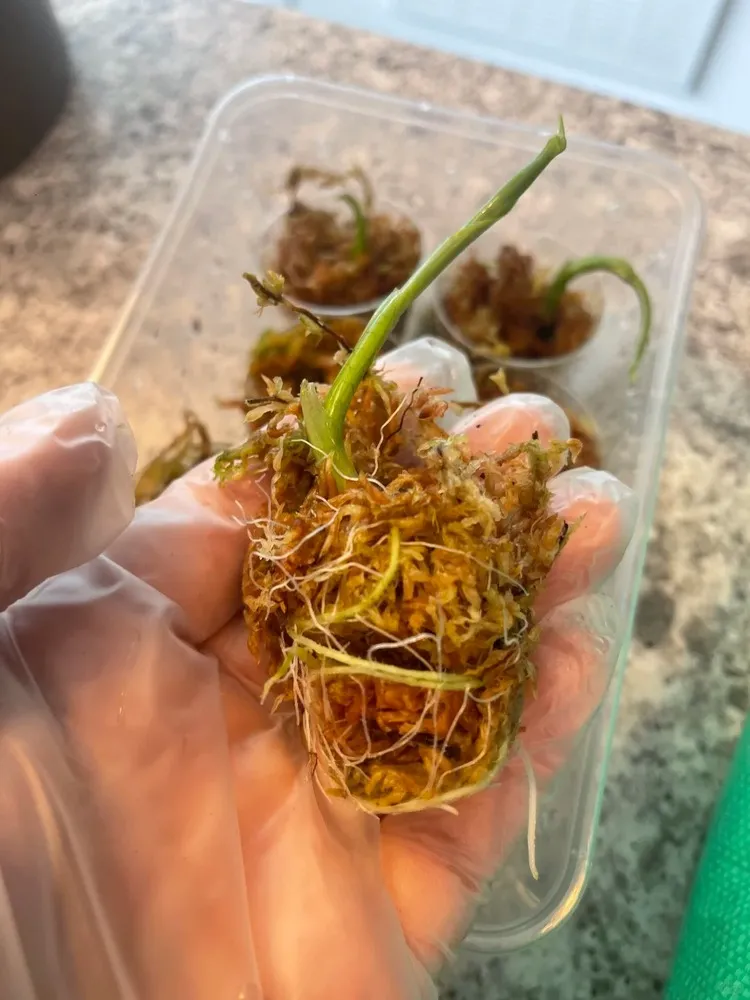
📅 Timeline: 40 Days to Alocasia Freedom
- August 28: Unearthed several pea-sized corms from the mother plant.
- Early September: Three of them sprouted and showed their first small leaves.
Excited, I transplanted them right away — but their roots were still weak.
Within a week, one melted down completely.
That mistake taught me an unforgettable lesson: airflow matters more than humidity. - October 7: Two remaining corms were finally ready for soil transfer — their roots had grown thick and white, wrapping around the moss.
Once transplanted, they adapted immediately and began steady leaf growth.
Now, after 40 days of patient care, I can officially say: I’ve reached Green Velvet freedom.
Watching each “baby” push out a new leaf feels like watching persistence pay off — slow, but certain.
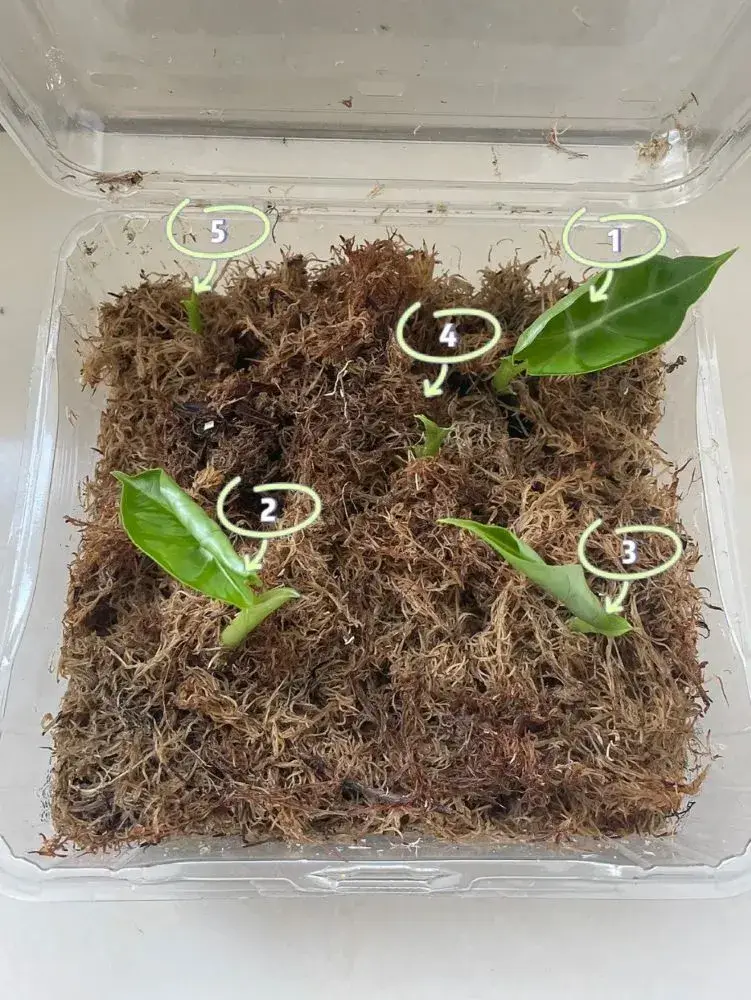
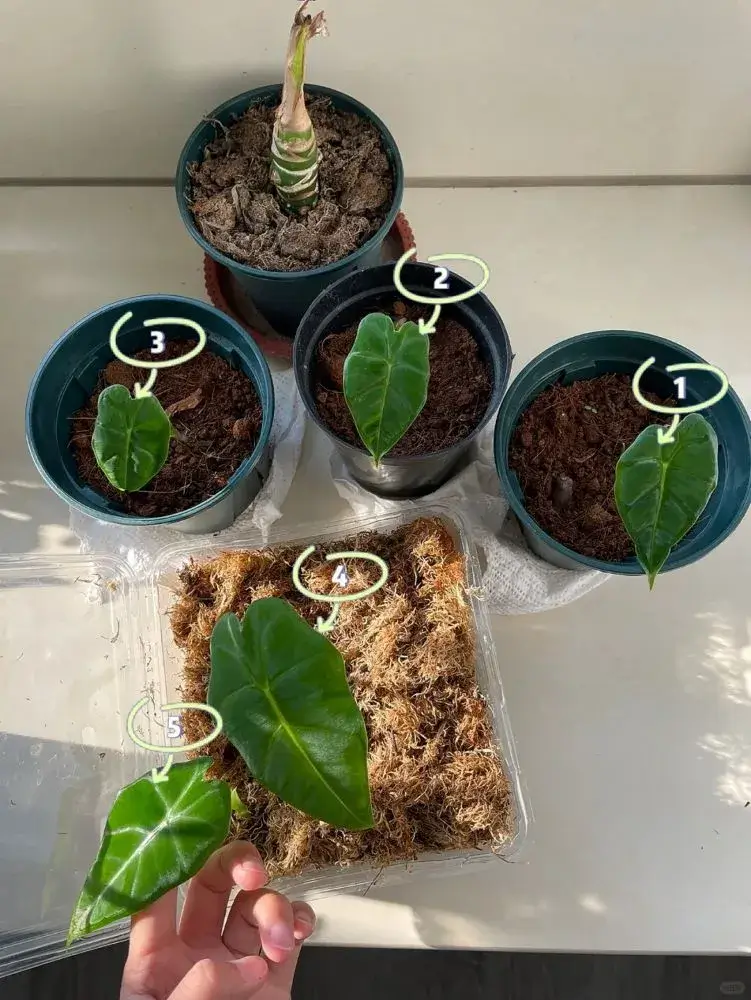
📷 Suggested visuals:
- Before-and-after shots (from corm to potted plant)
- Root close-ups showing healthy white fibers
- Color change of corms as they “wake up”
🌱 “The first three taught me what impatience costs. The last two proved that strong roots make everything easier.”
Growing Patience, Not Just Plants
The best time to propagate Alocasia is from spring to early summer, when warmth and light are steady.
The most reliable method remains the moss-start technique followed by gentle division and transplanting.
What truly determines success isn’t luck — it’s patience, airflow, and stable warmth.
💬 Propagation isn’t just multiplying plants — it’s learning how they breathe and begin again.
FAQ
That’s when roots grow fastest and corms “wake up” easily. Propagation in late fall or winter often fails unless you use grow lights and heating mats.
If it’s cooler, it may take up to 6 weeks.
Tiny white roots usually appear before any visible leaf growth — be patient and don’t move them too early.
Water propagation can help corms “wake up,” but after roots reach 1–2 cm, it’s best to transfer them into moss or airy soil.
Prolonged submersion leads to soft, oxygen-deprived corms.
If it’s mushy, hollow, or smells bad, it’s likely rotted.
You can also scratch the surface gently — green or white tissue underneath means it’s viable.
Keep the medium just damp, never soggy, and always allow fresh air circulation.
Rot usually stops when you dry the medium slightly and raise the temperature.
You can mist lightly with diluted rooting solution after roots appear,
but avoid fertilizer until the plant has at least two stable leaves in soil.
Still struggling with your Alocasia?
Learn how to fix common issues in our full Alocasia Care Hub, from watering balance to root health.
Go to Care Hub →