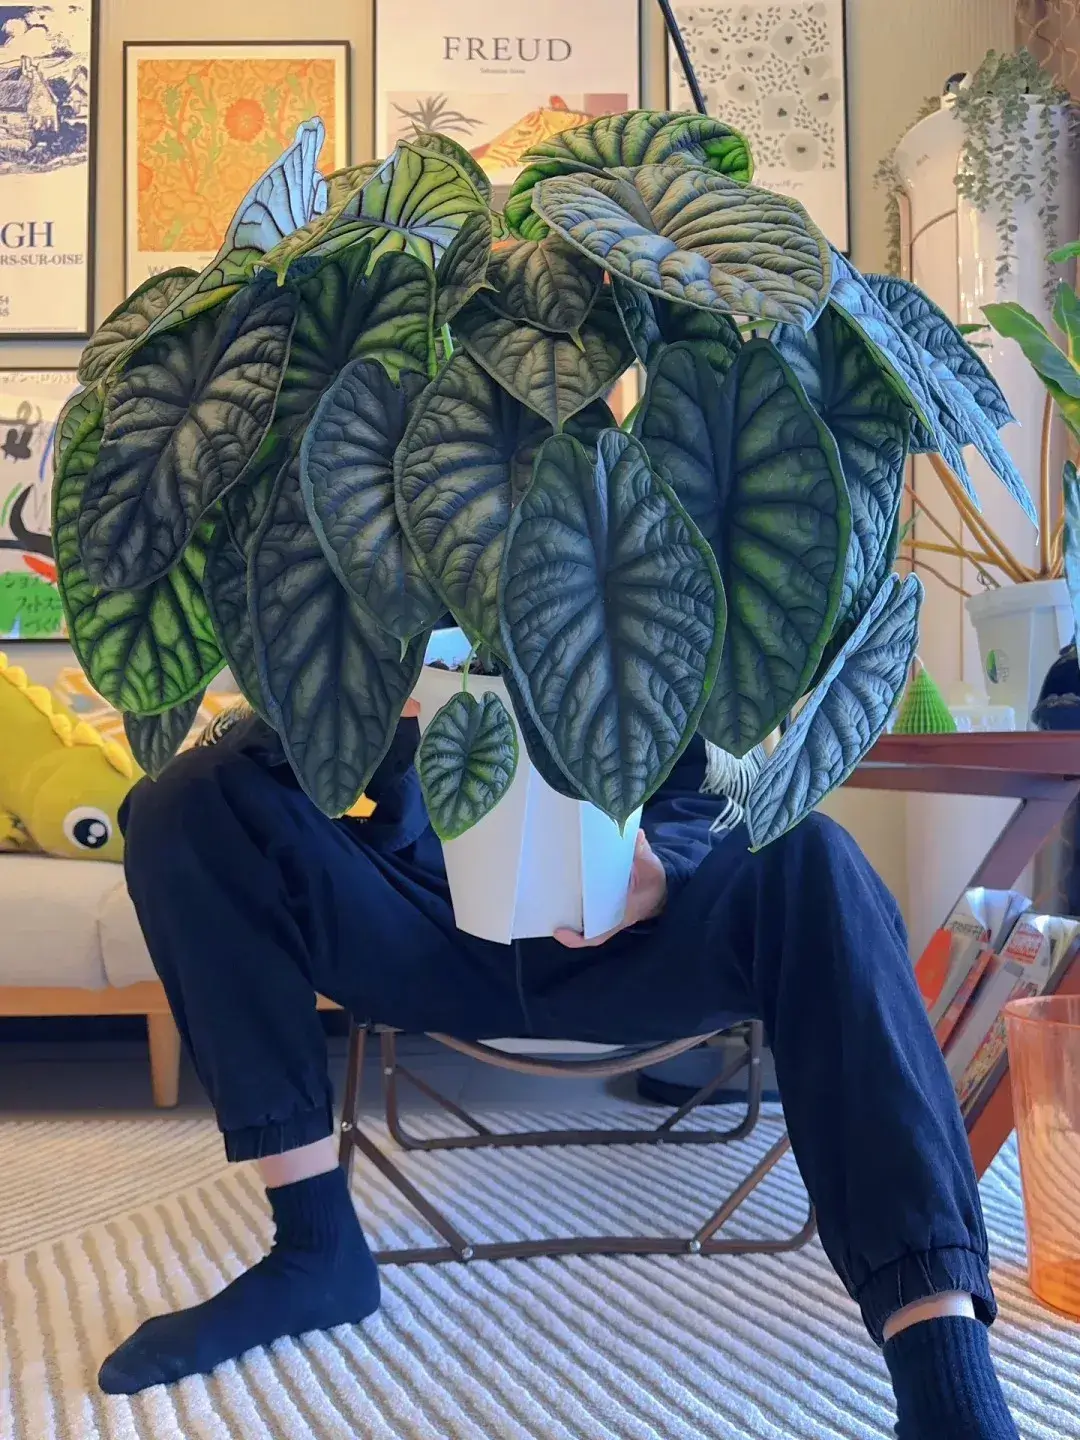
My Alocasia Longiloba was one of those plants that made me feel a little too confident at first. I bought it as a medium-sized plant in spring, and when it was happy, the leaves reached around 40 cm long. The silver veins looked sharp, the arrow-shaped leaves had that wild, elegant look, and for a while, it made Alocasias feel almost easy.
I used to think Alocasias were the more rewarding side of tropical plants. Compared with some Anthuriums, they grow faster, show bigger changes in a shorter time, and can look dramatic even when the setup is not perfect. A few ugly leaves or a small spider mite problem did not scare me much. But after growing this Longiloba for a while, I started to respect one thing more than anything else: the corm.
When an Alocasia is happy, it can grow so fast that you want to push it even harder — a bigger pot, a brighter spot, more room, maybe faster growth. That was exactly what I tried with mine. Instead of getting larger, it started to slow down. The new leaves came out smaller, and one of them looked distorted after being crowded near my larger Alocasia Regal Shield.
My Alocasia Longiloba Looked Perfect at First
I bought my Alocasia Longiloba in spring as a medium-sized plant, and at first, it made me understand why people fall so hard for Alocasias. It did not sit there doing nothing for months. Once it settled in, the plant started growing quickly, and the leaves became larger than I expected. At its best, one of the leaves was close to 40 cm long.
That was the stage when I felt this plant looked almost perfect. The arrow-shaped leaves were long and clean, the silver veins stood out beautifully, and the whole plant had that sharp, wild look that makes Longiloba different from the rounder, heavier-looking Alocasias. It did not feel like a slow collector plant. It felt alive and responsive.
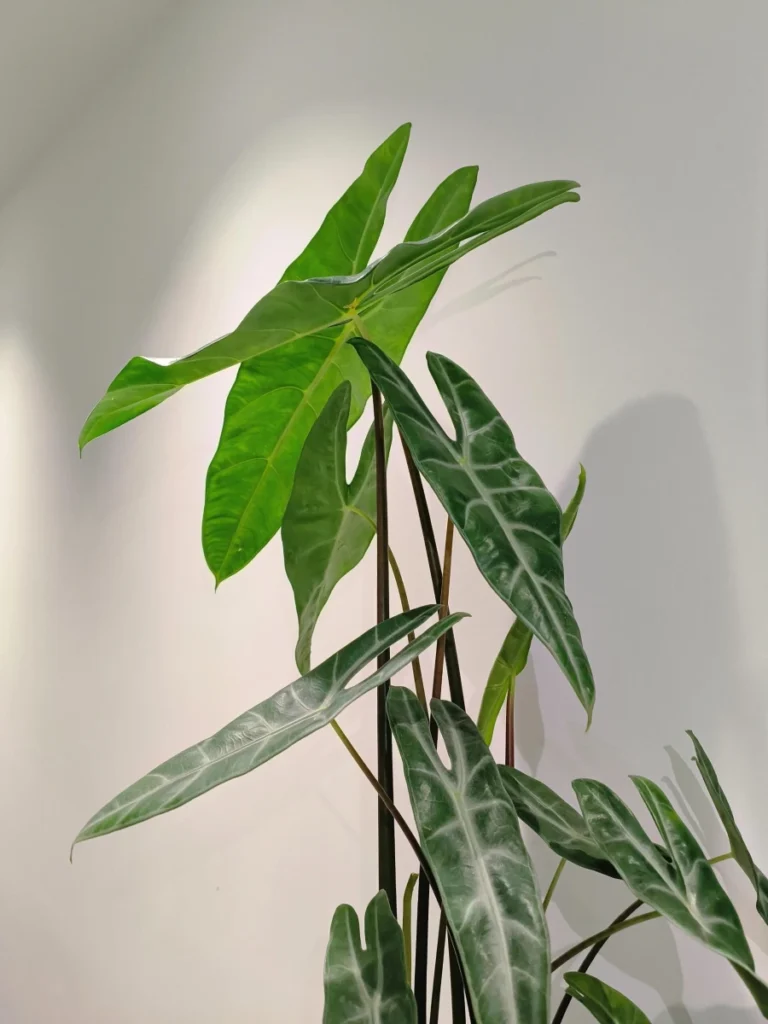
At that stage, I was not doing anything aggressive to push growth. The plant was simply in a stable spot, and it responded well. That early success probably made me too confident later, because I started to think a larger pot and a more ambitious setup would only make it better.
What Changed When I Tried to Push It Faster
The problem started when I became too confident with it. Because my Alocasia Longiloba had been growing so well, I thought I could give it a little push. I moved it into a larger pot and placed it near my Alocasia Regal Shield, hoping the extra room and stronger growing setup would help it size up even faster.
But the plant did not respond the way I expected. Instead of producing bigger leaves, it started to slow down. The next leaves came out smaller, and one new leaf looked noticeably distorted. That was when I realized I had probably changed too many things at once.
Looking back, I do not think the issue was simply that Alocasia Longiloba is a difficult plant. It was more about the way I changed its conditions. The larger pot made moisture harder to control, especially around the corm area. The spot near my larger Regal Shield also gave the new leaves less space to unfurl cleanly. Longiloba leaves look elegant when they open well, but the new growth seems quite sensitive when it is squeezed or pressed before it fully expands.
This was the first time the plant made me rethink the idea of “upgrading” an Alocasia. A bigger pot and a larger plant shelf neighbor may sound like better care, but for this Longiloba, the old setup was actually more stable. It did better when the pot was smaller, the moisture was easier to manage, and the new leaves had enough open space around them.
The Setup That Worked Best for Mine
The setup that worked best for my Alocasia Longiloba was not complicated. It did best in bright indirect light, with the light level staying under roughly 10,000 lux. The plant received enough brightness to grow strong leaves, but it was not sitting in harsh direct sun. That balance seemed important. Too much sun can stress the leaves, but too little light can make the plant weaker and less compact.
When it was growing well, it was also still in a smaller pot. At the time, I did not think much about that, but looking back, the smaller pot probably helped keep the moisture level easier to control. The mix did not stay wet for too long, and the corm was not sitting in a large amount of damp soil. For a plant like this, I now think a snug pot with an airy Alocasia soil mix is often safer than a pot that gives it too much extra room too soon.
Another thing I would pay more attention to now is the space around the plant. Alocasia Longiloba has narrow, arrow-shaped leaves, and the new growth can be surprisingly delicate while it is still unfurling. I would not tuck it tightly beside a much larger Alocasia, because even light pressure on a new leaf can affect how cleanly it opens.
If I were setting up this plant again, I would keep it in a bright but protected spot, use a pot that fits the root system rather than one that looks generous, and make sure the new leaves have room to open without being pressed by neighboring plants. For my plant, that kind of stable, slightly restrained setup worked much better than trying to push it into faster growth.
Watering Is Where I Became More Careful
Watering is the part of Alocasia Longiloba care that made me much more cautious. I used to hear people describe Alocasias as plants that can handle drying out, so it is easy to fall into the habit of waiting until the pot feels dry and then giving the whole thing a heavy soak. After growing this plant, I do not think that simple Alocasia watering routine is wrong in every situation, but I do think it needs more context.
Alocasia Longiloba can tolerate a little dryness better than many people expect, especially if the plant is warm, bright, and actively growing. What worries me more is not one slightly dry day. It is the corm area staying wet and airless for too long. Once moisture sits around the corm in a heavy or slow-drying mix, the plant can go downhill very quickly.
If the soil mix is very airy and chunky, I feel more comfortable watering the pot thoroughly. A fast-draining mix gives the roots moisture, but it also lets air return around the root zone quickly. In that kind of setup, a full watering is usually less risky because the plant is not sitting in a wet pocket for days.
My own mix was more moisture-retentive: coarse peat with only a small amount of perlite. With that kind of mix, I became more careful. Instead of always soaking the whole pot from the top, I prefer edge watering or a short bottom-watering session. That way the outer roots can take up moisture without keeping the corm area too wet for too long.
The Later Repot: What I Changed After Checking the Roots
Later, when I checked the plant again, I did not want to strip the root ball completely bare. The roots looked healthy and white, so this was not a full rescue repot. My goal was to loosen the old mix, protect the corm area, and move the plant into a setup where moisture would be easier to control.
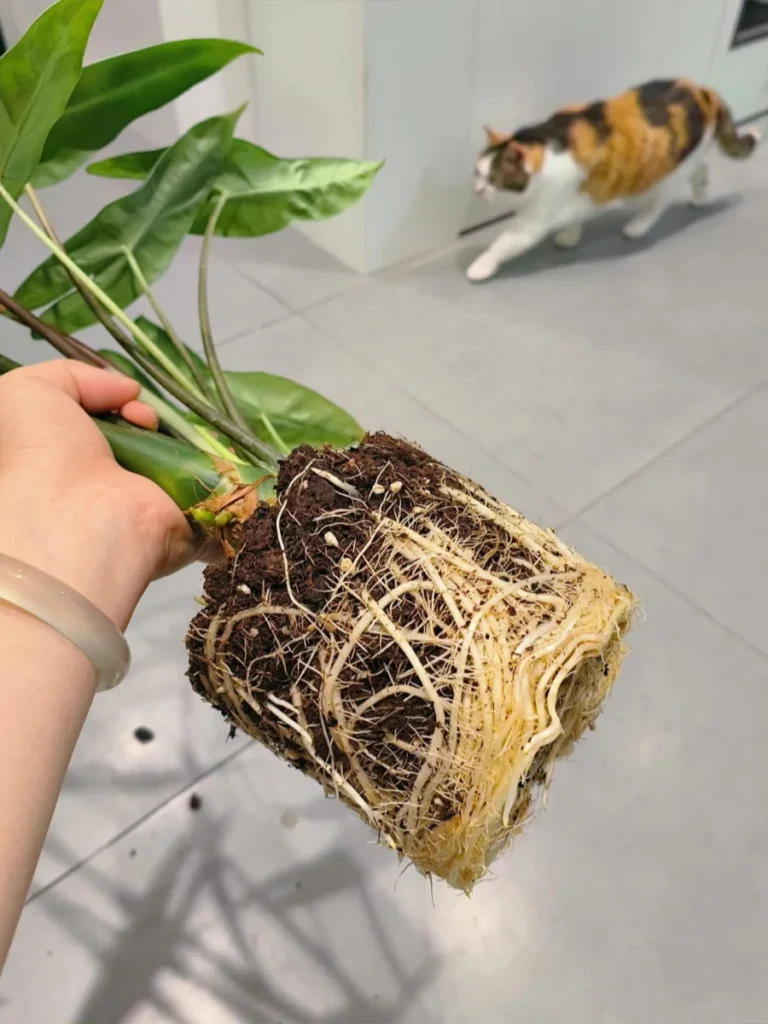
I used a self-watering pot that was only slightly larger than the old pot, with a mix that felt close to the original texture. I do not like making a dramatic soil change unless the old mix is clearly bad, because Alocasias can react quickly when the roots are disturbed too much.
To remove the plant, I gently squeezed around the sides of the old pot, turned it out carefully, and supported the root ball with one hand instead of pulling from the stems. Then I loosened the circling roots by hand, removed any soft or questionable roots, and checked whether the corm was buried too deeply. If the base is already sitting at a good depth, I would not dig around it too much.
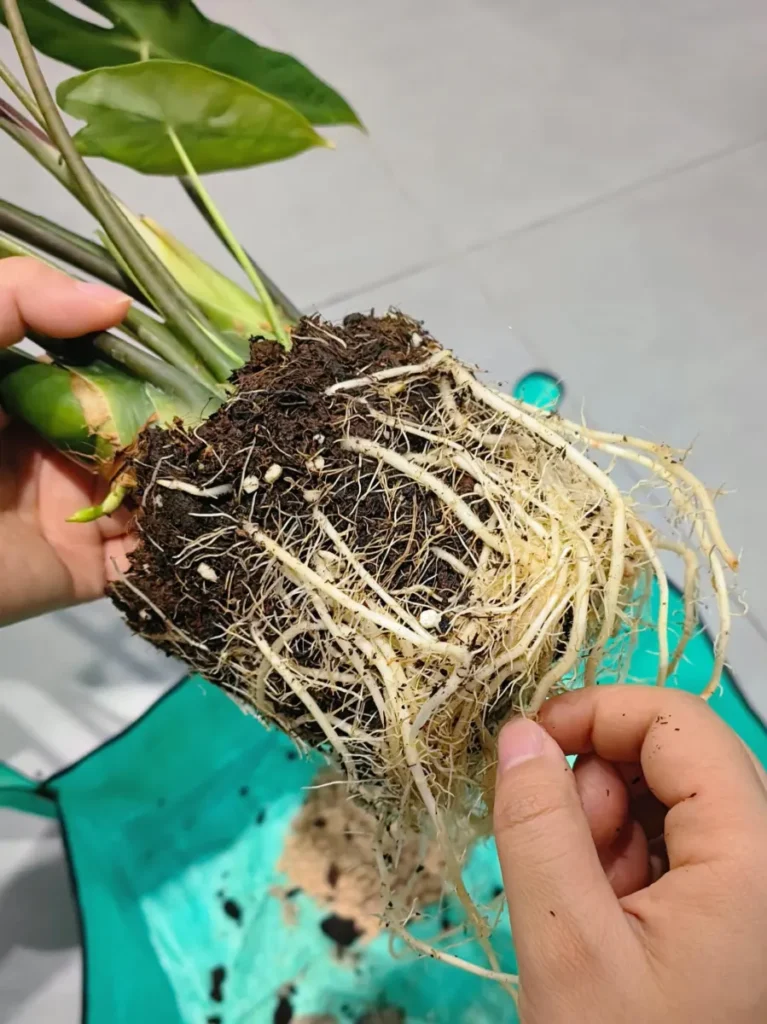
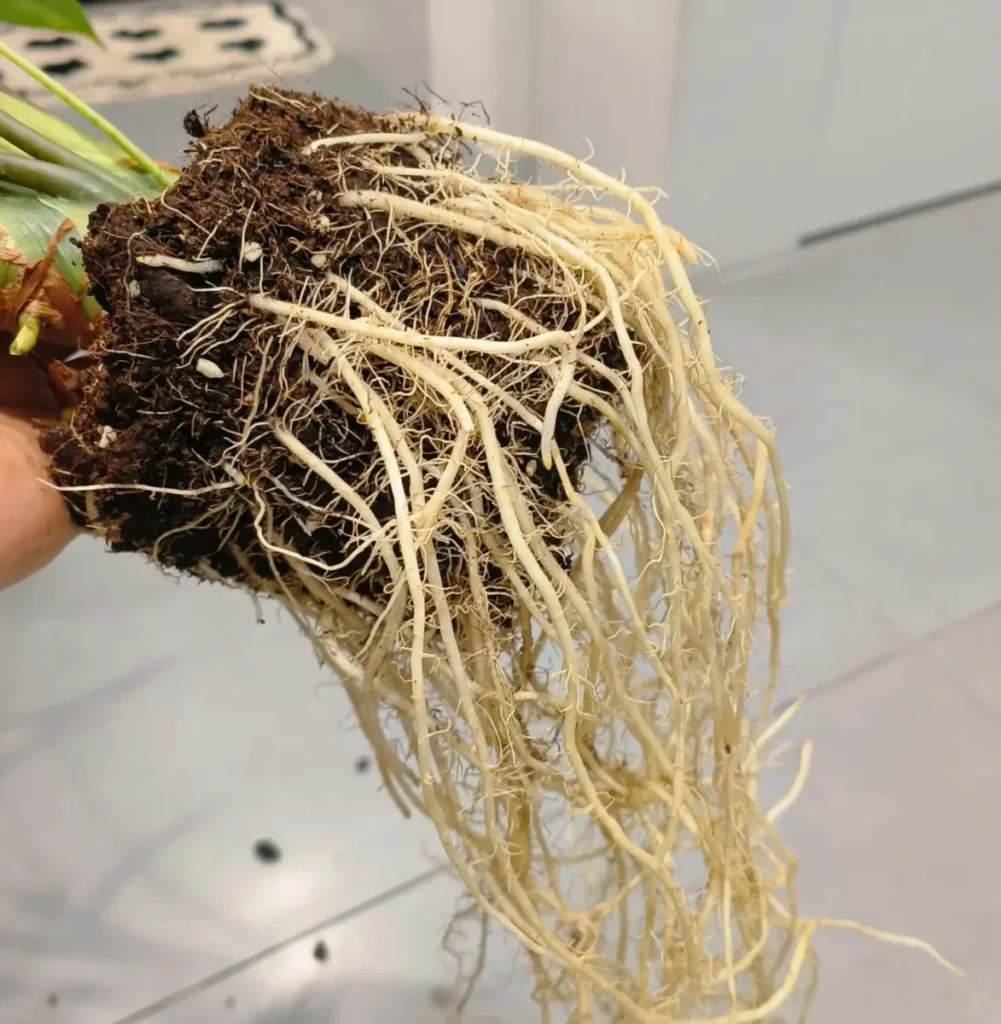
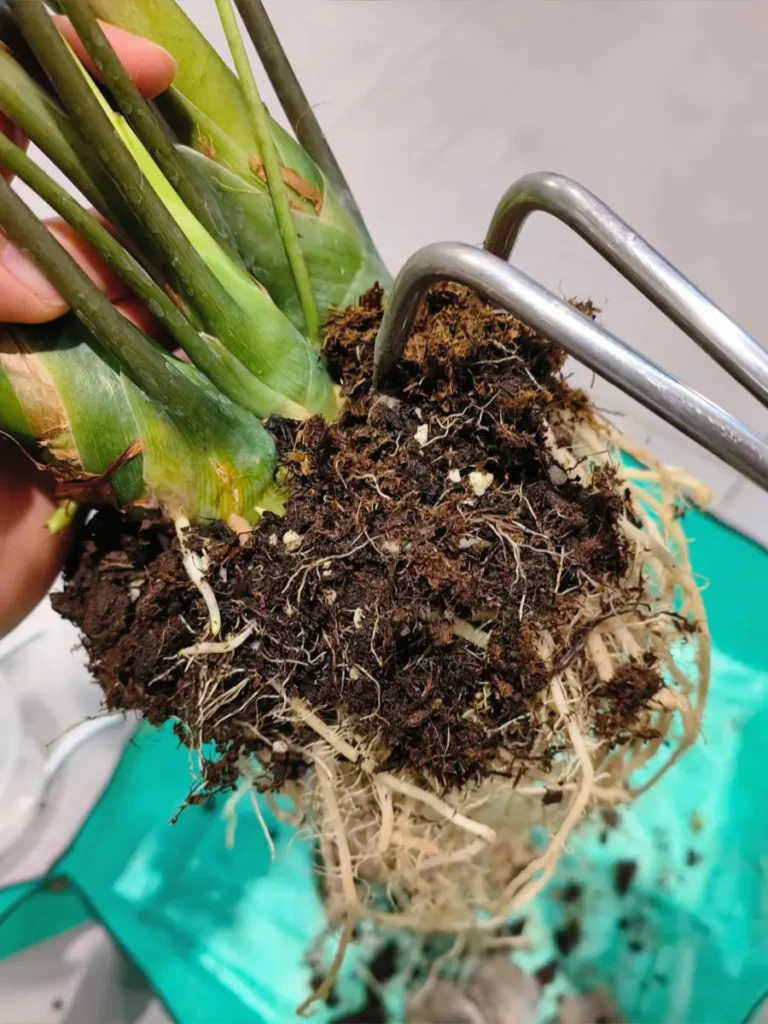
For the new pot, I threaded the wick first, added a small layer of mix at the bottom, then placed the root ball in while gently turning it into position. I tried to spread the roots outward instead of letting them bunch up in the center. Once the plant was sitting at the right height, I filled around the sides and pressed the mix lightly so there were no big empty pockets.
After repotting, I watered the inner basket by itself first, using small amounts of water several times instead of flooding everything at once. Once the mix was evenly moist, I placed the basket back into the outer reservoir. I kept the water level below the bottom of the inner basket, because I did not want the corm area sitting constantly wet.
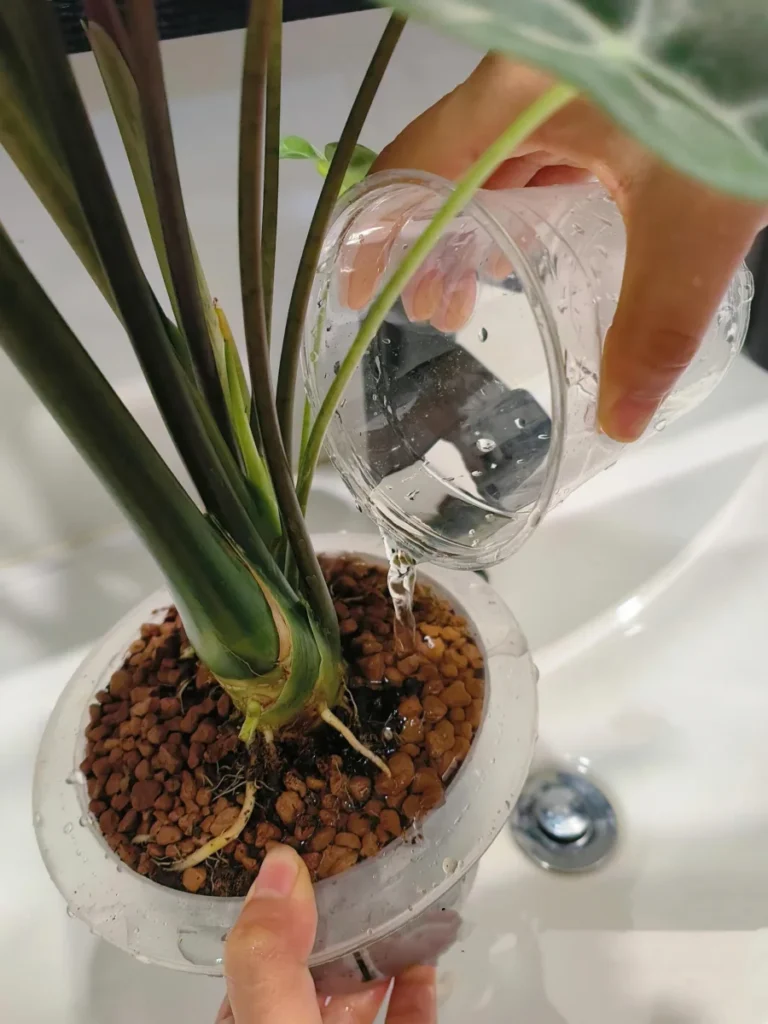
After that, I gave the plant a few days in a cooler, shaded, well-ventilated spot before moving it back to brighter indirect light. Because I kept most of the roots intact, the leaves did not collapse after repotting. That was another reminder for me: with Alocasia Longiloba, gentle handling matters more than doing a dramatic root clean-out.
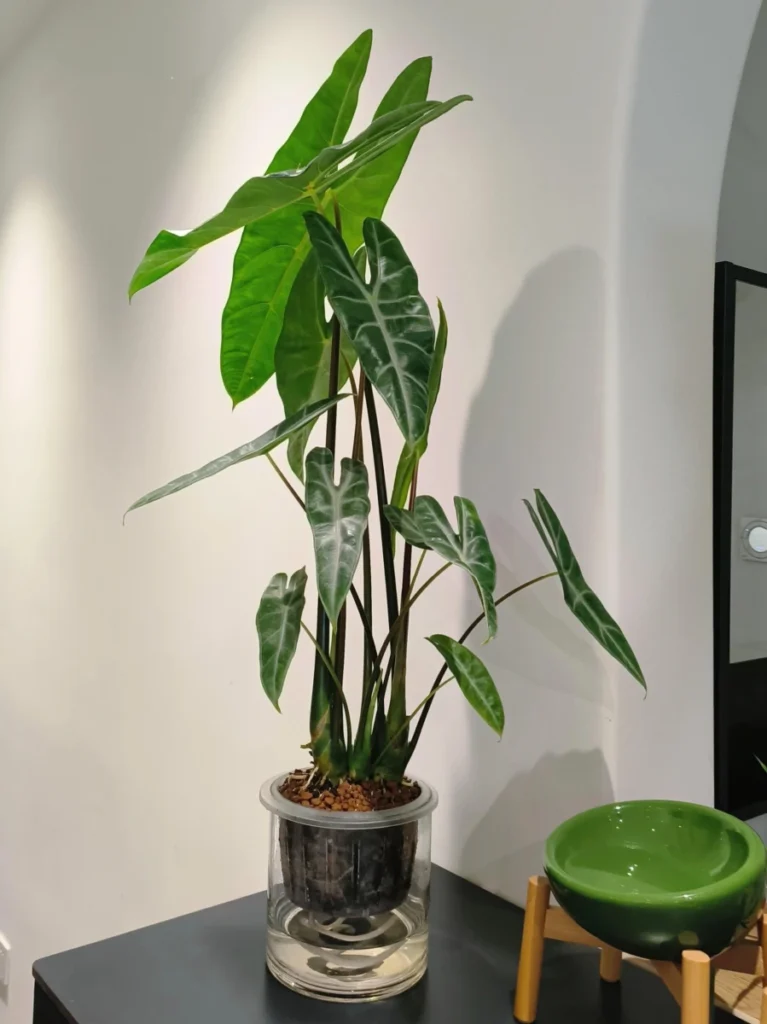
With this plant, I worry less about one dry day and more about a wet, airless pocket around the corm. Longiloba is not exactly afraid of water. It is afraid of water staying in the wrong place for too long.
Why New Leaves Can Come Out Smaller or Deformed
One thing I noticed with my Alocasia Longiloba is that the new leaves seem quite sensitive before they fully open. When the leaf is still rolled up, it does not take much pressure to affect the final shape. If it gets pressed by a nearby plant, trapped against an older leaf, or pushed into a crowded corner, the leaf may open smaller, twisted, or uneven.
This became more obvious after I moved mine beside my larger Alocasia Regal Shield. The Longiloba did not have as much open space around it, and the new leaf had to unfurl in a more crowded area. After that, the leaf came out noticeably deformed. I cannot say crowding was the only reason, but I do think it played a big part.
Repotting can also affect the next leaf. When an Alocasia has just been moved into a new pot, the roots and corm need time to adjust. If that happens at the same time as a change in light, position, airflow, or watering rhythm, the next leaf may show the stress before the rest of the plant looks seriously unhappy.
Because of that, I would not immediately treat a smaller or deformed Longiloba leaf as a fertilizer problem. It is tempting to think the plant is missing something, but in my case, the more likely causes were crowding, repotting stress, and a less stable setup. Adding more fertilizer would not have fixed a leaf that was physically squeezed while it was opening.
For this plant, I pay more attention to the next new leaf than to the damaged one. A deformed leaf will not correct itself once it has hardened. What matters more is whether the plant produces cleaner, stronger growth after the setup becomes stable again.
The Part I Respect Most Now: Corm Rot
After growing more Alocasias, I have become much less afraid of ugly leaves. Spider mites are annoying, scorched edges look bad, and yellowing old leaves can make the plant look tired, but most of those problems are still manageable. They may slow the plant down, but they do not always mean the whole plant is lost.
Corm rot is different. Once the corm starts to rot, the plant can collapse much faster than the leaves suggest. That is the part of Alocasia care I respect the most now, especially with plants like Longiloba that can look strong one week and suddenly decline the next. If the base already feels soft, I would treat it more like an Alocasia root rot problem than a normal leaf issue.
What makes it more frustrating is that the roots may not always look terrible at first. Sometimes you can still see white roots, but if the area around the corm has stayed wet and airless for too long, the center of the plant may already be under stress. By the time the leaves start to droop badly or the base feels soft, the problem is often much harder to reverse.
That is why I focus more on prevention than rescue with this plant. I would rather keep the pot slightly snug, avoid overly heavy watering, and protect the corm from sitting in damp soil for days than try to save it after rot has already started. With Alocasia Longiloba, one imperfect leaf is not a big deal. A soft corm is.
What I Would Do Differently Next Time
If I were growing this Alocasia Longiloba again from the same stage, I would not rush to move it into a larger pot. I used to think a bigger pot meant more room for growth, but with this plant, the safer choice would have been to keep it slightly snug until the roots clearly needed more space. A smaller pot made the moisture easier to control, and that mattered more than giving the plant extra soil around the corm.
I would also give the new leaves more space. After placing mine near a much larger Alocasia, I realized Longiloba does not like being crowded while it is unfurling. The leaves may look strong once they harden, but the new growth is delicate before it opens. Next time, I would keep it away from large leaves that can press against the emerging leaf or block airflow around the plant.
I would not water it by a fixed schedule either. A “water every few days” rule sounds simple, but it does not really work for this plant indoors. I would check the weight of the pot, the condition of the older leaves, and how dry the mix feels before watering. If the plant is in a chunky, airy mix, I can water more thoroughly. If the mix holds moisture longer, I would be much more careful and avoid keeping the corm area wet.
Most importantly, I would stop trying to push it for bigger leaves too quickly. Alocasia Longiloba can grow beautifully when it is happy, but chasing one larger leaf is not worth increasing the risk of corm rot. I would rather let it grow a little slower in a stable setup than push it with a bigger pot, heavier watering, or a crowded position.
In winter, I would be even more hands-off. When the light is weaker and the room is cooler, this plant does not use water the same way it does during active growth. That is when I would reduce watering, stop fertilizing, and avoid unnecessary repotting or checking unless there are clear signs of rot. With this plant, doing less at the right time is sometimes the best care.
Is Alocasia Longiloba Beginner-Friendly?
I would not call Alocasia Longiloba the hardest Alocasia to grow, but I also would not describe it as completely beginner-friendly. When the conditions are stable, it can grow quickly and look very rewarding. The problem is that it does not always forgive sudden changes well, especially when pot size, watering, light, and placement all change at the same time.
Compared with some common ornamental Alocasias, Longiloba feels a little more sensitive to unstable care. It needs bright indirect light, careful watering, and enough airflow around the corm. If the pot stays wet for too long or the new leaves are crowded while unfurling, the plant can respond with smaller leaves, distorted growth, or a sudden slowdown.
For someone who has already grown a few Alocasias and understands the risk of corm rot, I think Longiloba is very worth trying. But if this is your first Alocasia, I would start with a more forgiving Alocasia type first, learn how Alocasias behave indoors, and then try Longiloba once you are more comfortable reading the plant.
FAQ
Love discovering new Alocasias?
If you like Alocasias with narrow leaves, strong veins, and a more architectural shape, browse my Alocasia Varieties Hub to compare Longiloba with other indoor Alocasia types.
Go to Varieties Hub →