When you see root rot, it feels like the end of the world for your plants. The leaves fall off, the stem gets mushy, and the dirt smells weird. Everything inside you says it’s already too late. But that’s not always the case with Alocasias. The sooner you figure out what’s wrong, the more chance your plant has of coming back stronger than before.
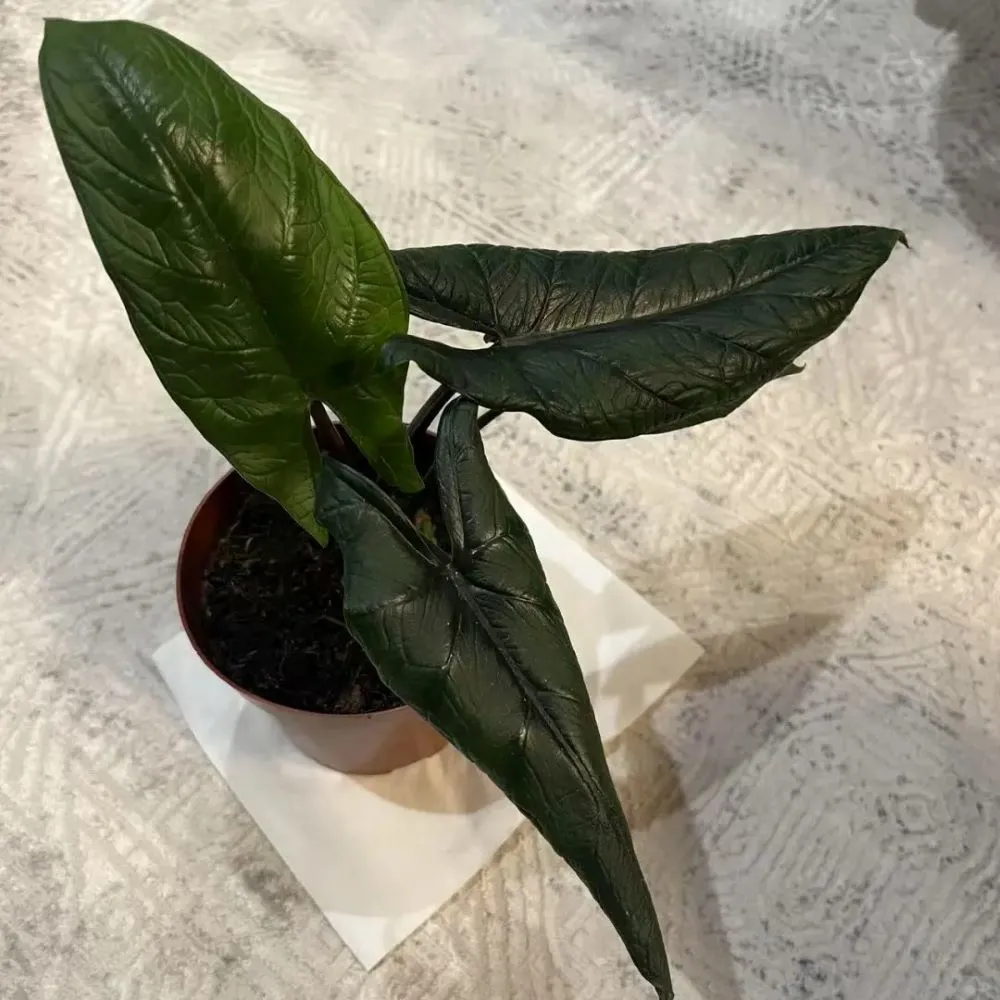
I learnt this the hard way with one of my Alocasia. It arrived looking perfect, but within days the leaves curled, softened, and collapsed. I eventually trimmed it all the way back, leaving only a stump. I was sure it was over — but with warmth and time, a tiny new shoot emerged. Later, when I repotted it, I found several small corms hiding in the soil. That plant taught me not to give up too soon.
This tutorial will show you exactly what I do when an Alocasia starts to have problems, whether it’s just a little too much water, early root stress, or full-blown rot. You’ll learn how to detect the difference, what to do right away, how to keep the plant healthy after that, and how to stop the same thing from happening again.
Root rot looks quite bad. It seems like it’s over. But if you know what to look for and act immediately, it’s one of the easiest problems for an Alocasia to fix. Let’s go over it one step at a time.
Quick Comparison Table: Waterlogged vs True Root Rot
| Check This First | Waterlogged Roots (Still Safe) | True Root Rot (Emergency) |
|---|---|---|
| Leaf Reaction | Limp, yellowing, curl slightly; not collapsing | Sudden wilt or collapse; no response after watering |
| Root Texture | Soft/pale, flexible, no smell | Mushy, black/brown, smelly; breaks when pinched |
| Soil Behavior | Wet too long; top moist but bottom compacted | Soggy, heavy, sour or moldy odor |
| Stem/Base | Firm | Soft, dark, leaking water |
| Speed of Decline | Slow—plant looks tired | Fast—decline within days |
| My Simple Rule | “If it’s soft but odorless → waterlogged.” | “If I can smell it when unpotting → rot, 100%.” |
Check these signs before taking action.
What Causes Waterlogging vs True Root Rot?
Before you can fix the problem, it helps to understand why it happened. Waterlogging and true root rot may look similar on the surface, but they are triggered by very different conditions. One is about oxygen deprivation, the other is about actual decay. Knowing the cause helps you choose the right treatment—gentle correction vs urgent rescue.
Below are the real-world causes I’ve seen again and again in my own Alocasias.
What Causes Waterlogging (Oxygen Deprivation)
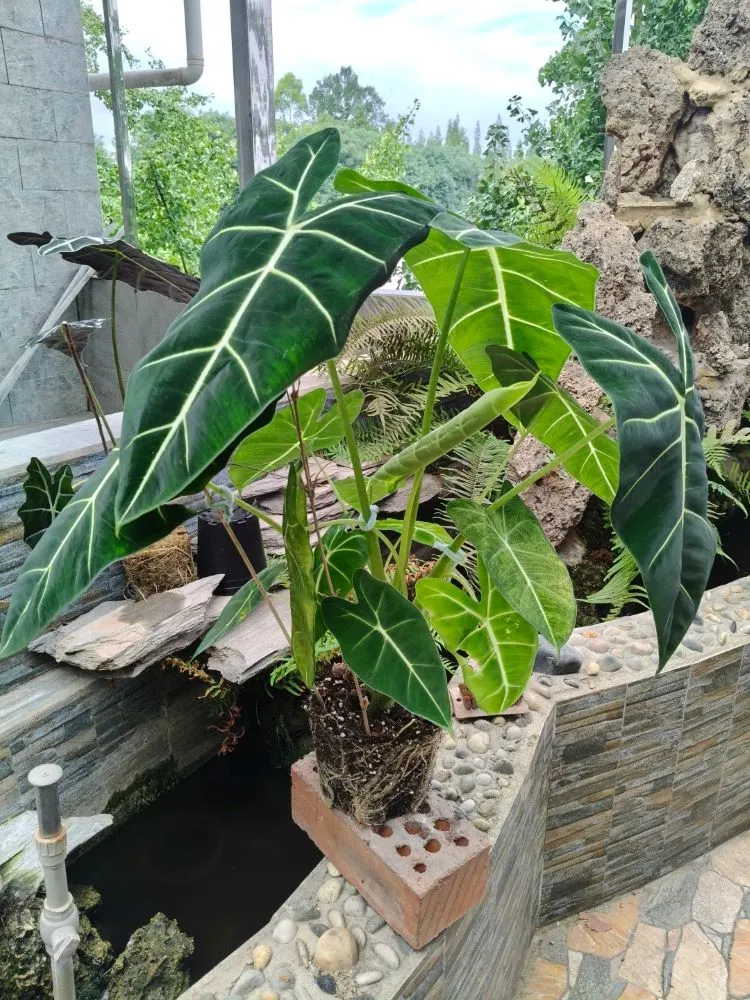
Waterlogging happens when the roots are alive but unable to breathe. The environment is too dense, too wet, or too closed-off for oxygen to reach the root system.
Here are the most common triggers:
• Compacted, old soil
Soil that hasn’t been refreshed for years becomes dense, heavy, and airless.
Moisture lingers on top, while the lower layer becomes hard and suffocating.
• Poor ventilation around the pot
Airflow is a silent hero in root health.
When a plant sits in a tight corner, against a wall, or in a room with stagnant air, moisture evaporates much slower and roots stay damp far too long.
• Non-breathable pots
Glazed ceramic, plastic nursery pots, or anything with minimal air exchange can trap moisture.
If drainage holes clog—even partially—waterlogging becomes almost guaranteed.
• Overwatering during cool seasons
In cooler months, soil dries dramatically slower.
A normal, your usual Alocasia watering schedule becomes “too much” in fall or winter.
• Slow-drying soil (your real experience)
This is the classic scenario you described: slow-drying, compacted soil that stays cold at the bottom.
The top tricks beginners into thinking the plant is hydrated, but the bottom is suffocating roots.
Waterlogged roots are stressed, swollen, and pale—but not yet rotten.
If caught early, recovery is extremely likely.
What Causes True Root Rot (Actual Decay)
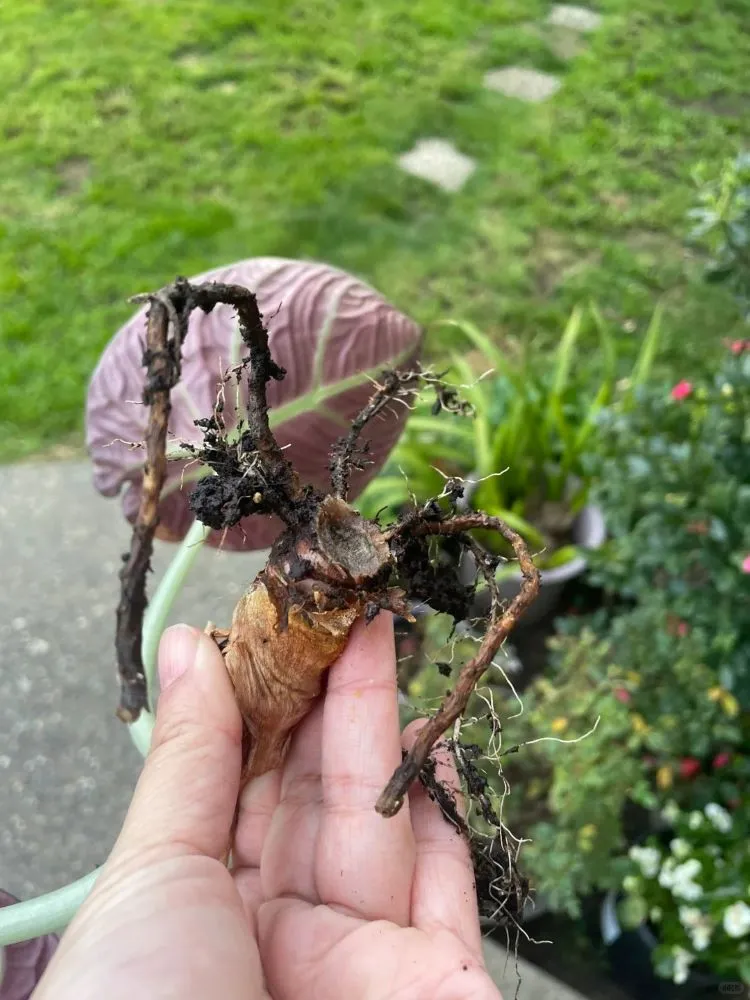
True root rot is not just “too much water.” It’s a biological breakdown of the root system caused by fungus, bacteria, or prolonged suffocation. Once decay starts, it spreads quickly.
Here are the main causes, including your real-life cases:
• Standing water at the bottom of the pot
Even a thin layer of water pooling under the soil can suffocate roots.
Many rot cases begin simply because there was water sitting in the saucer.
• Bacterial or fungal infection
Rot often starts from a wounded root or a contaminated soil mix.
Once the infection takes hold, roots turn mushy, dark, smelly, and collapse when touched.
• Fertilizer burn → root injury → decay
Too-strong fertilizer can scorch fine root hairs.
Those injured points become entry doors for bacteria and fungus, accelerating rot.
• Low temperature + wet soil
This combination is deadly.
Cool, wet roots cannot respire, and pathogens thrive.
It’s extremely common in fall/winter, especially after a routine watering.
• Transport shock
Plants shipped long distances often arrive stressed, dehydrated, or chilled.
When watered immediately after unpacking, the weakened roots can rot rapidly.
• Greenhouse-to-home transition shock
(Perfectly translated as greenhouse-to-home transition shock.)
Alocasias grown in commercial greenhouses have ideal humidity, warmth, and steady light.
Bring them into a dry home, colder room, or stagnant-air corner, and the root system struggles.
Most plants also go from bright, filtered greenhouse light to much lower indoor light. If watered heavily during this adjustment period, rot forms before the plant can adapt.
⭐ Why Knowing the Cause Matters
- Waterlogging → gentle correction (new soil, more airflow, adjust watering)
- True rot → immediate rescue (cutting, sterilizing, repotting)
And most importantly:
Waterlogged roots can fully recover.
True rot needs action—fast.
Emergency Rescue: What To Do Right Now
If you’ve confirmed root rot—or even suspect it—this is the moment to act.
Alocasias decline fast once pathogens take hold, but they also recover fast when the roots can breathe again.
The following steps combine general best practice with the exact techniques I’ve used to save my own plants, including the “Polly” and multiple cases of Dragon Scale rot.
Step 1 — Remove the Plant From the Pot Immediately
Don’t wait for the soil to dry. Don’t water. Don’t “observe a few more days.”
The plant needs air.
Use this technique to get the plant out without damaging roots:
Run a small tool (a butter knife or mini trowel) along the inside of the pot to loosen the soil, then gently tap the bottom while holding the plant upside down.
Running a thin tool along the inside edge of the pot helps loosen the root ball, making it easier to lift out—especially when the soil is compacted or overly wet.
Step 2 — Wash and Inspect the Roots Under Bright Light
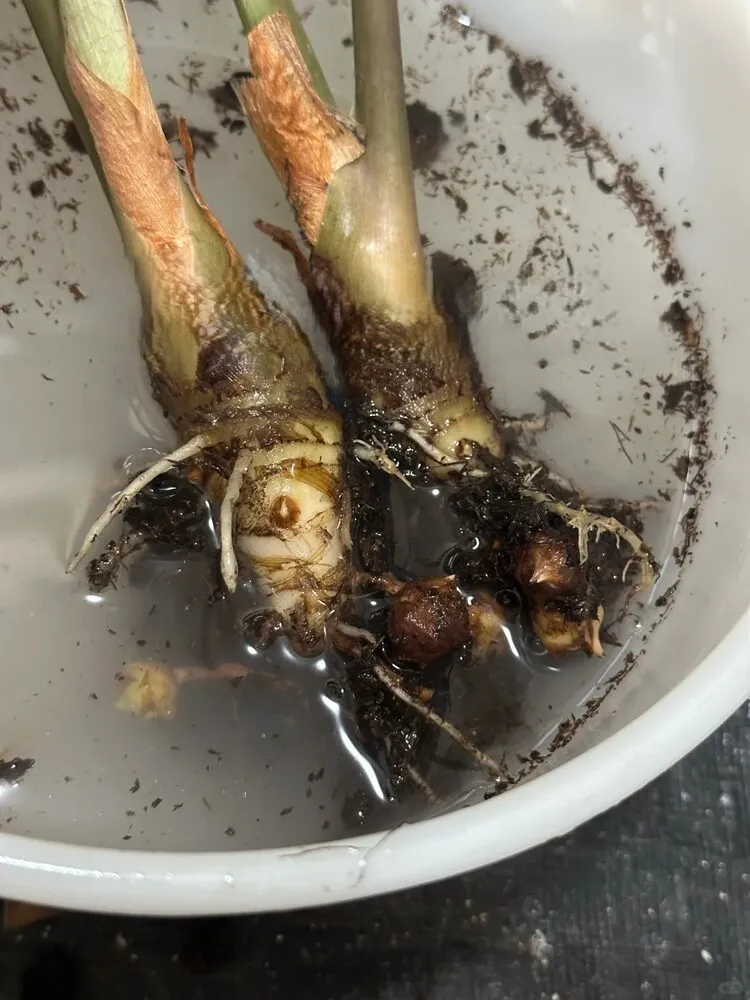
Rinse the roots with room-temperature water until all old soil falls away.
You need to see the roots clearly to diagnose the situation.
Here’s what to look for:
- Healthy roots → firm, white or cream, slightly springy
- Waterlogged roots → pale, slightly soft, swollen, but no bad smell
- Rotten roots → brown/black, mushy, stringy, collapse when pinched, and smell sour or rotten
If the smell hits you as soon as you unpot, it’s rot—no question.
Step 3 — Cut ALL Rotten Roots (Be Ruthless)
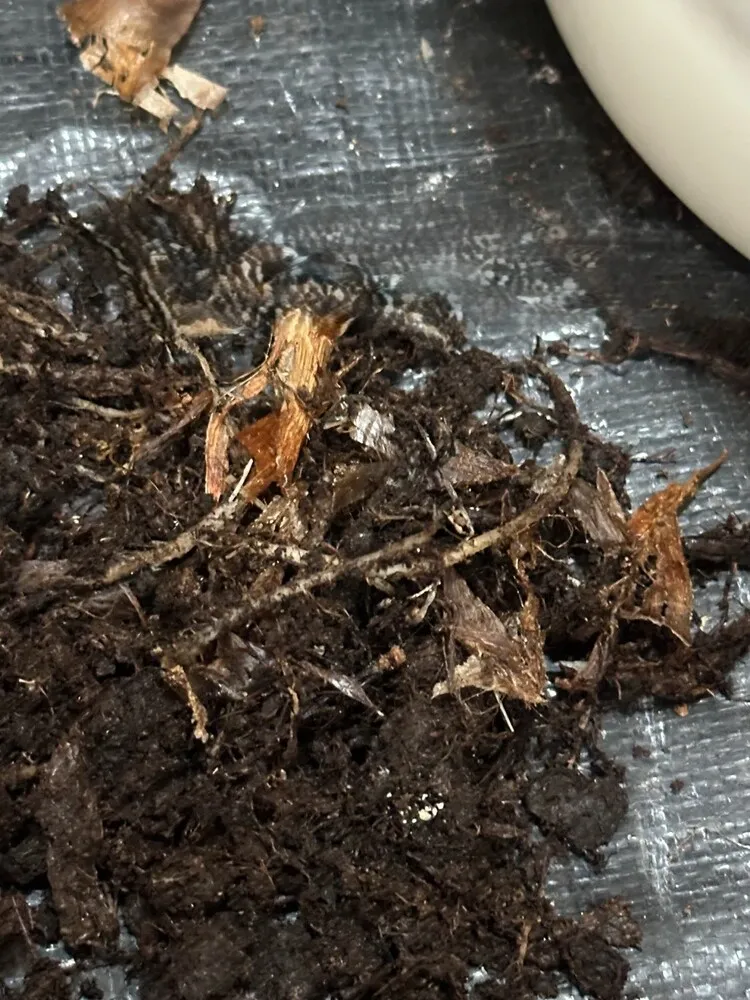
This is the step most beginners hesitate on, and it’s why rot comes back.
Use sterilized scissors or pruning shears and remove every mushy, dark, smelly root.
Cut back to firm, pale tissue only.
Don’t be sentimental—rot spreads.
Removing too little is worse than removing too much.
Even if you’re left with only a small cluster of healthy roots, that’s enough for recovery.
Step 4 — Treat the Roots With Fungicide or Hydrogen Peroxide
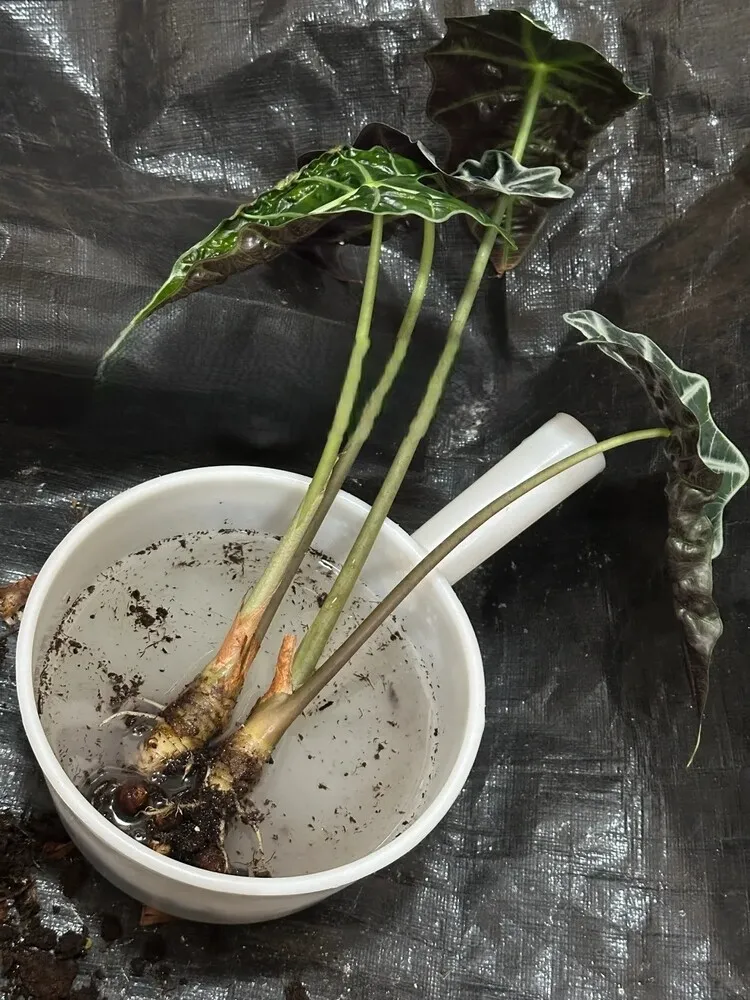
This step prevents secondary rot, which is extremely common if the roots go back into soil while still damp.
You can use:
- Fungicide (carbendazim / thiophanate-methyl)
- 3% hydrogen peroxide diluted 1:1 with water
My personal routine:
Soak the trimmed root system in fungicide solution for 15–20 minutes, then let it dry in open air for 2–3 hours.
Drying is essential—the surface should look slightly wrinkled before repotting.
Skipping this step is one of the top reasons rot returns.
Step 5 — Repot Into Fresh, Airy Soil (the “Breathing Mix”)
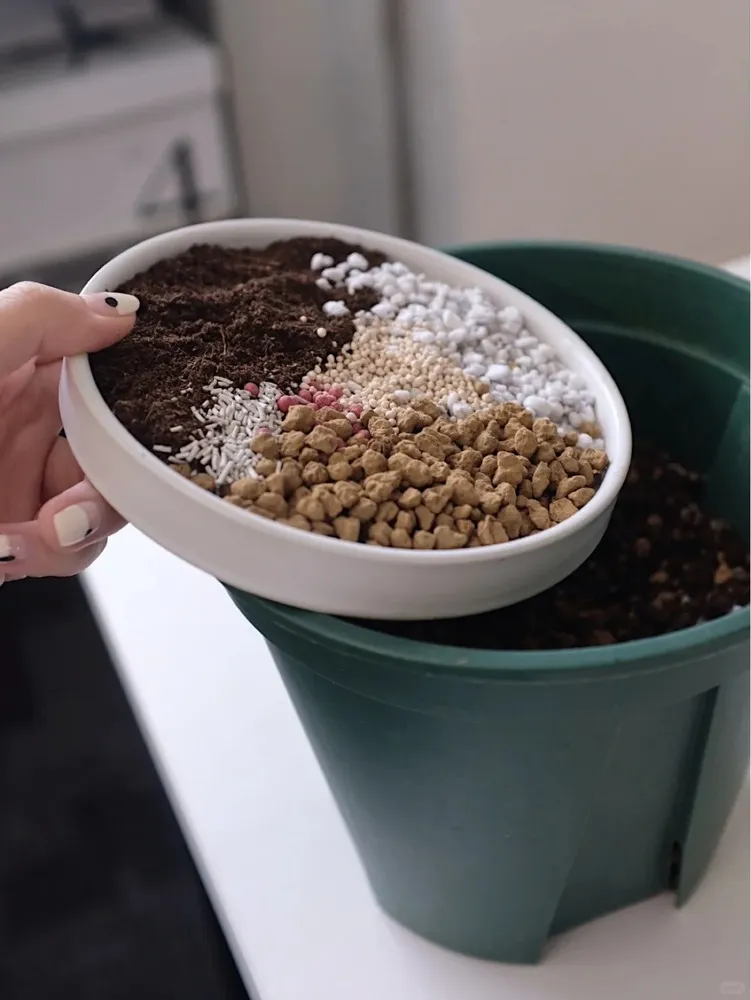
80% of waterlogging problems come from soil that simply cannot breathe.
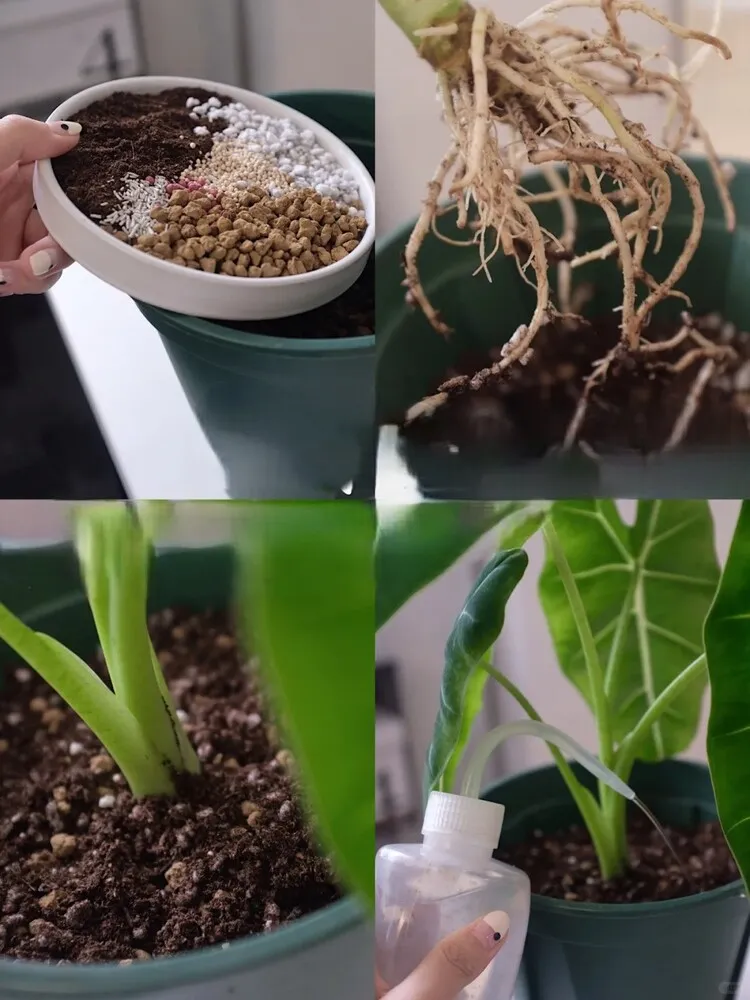
If you don’t have a mix ready, you can follow my go-to Alocasia soil recipe at home. Use a fresh, open mix like this:
- 40% peat or coco peat
- 30% perlite
- 20% coarse coconut husk or bark chips
- 10% pumice or additional aeration material
This mix drains quickly but retains enough moisture for Alocasia roots to grow back safely.
Never reuse old soil.
It may still contain pathogens.
Step 6 — Use the Shallow Planting Method
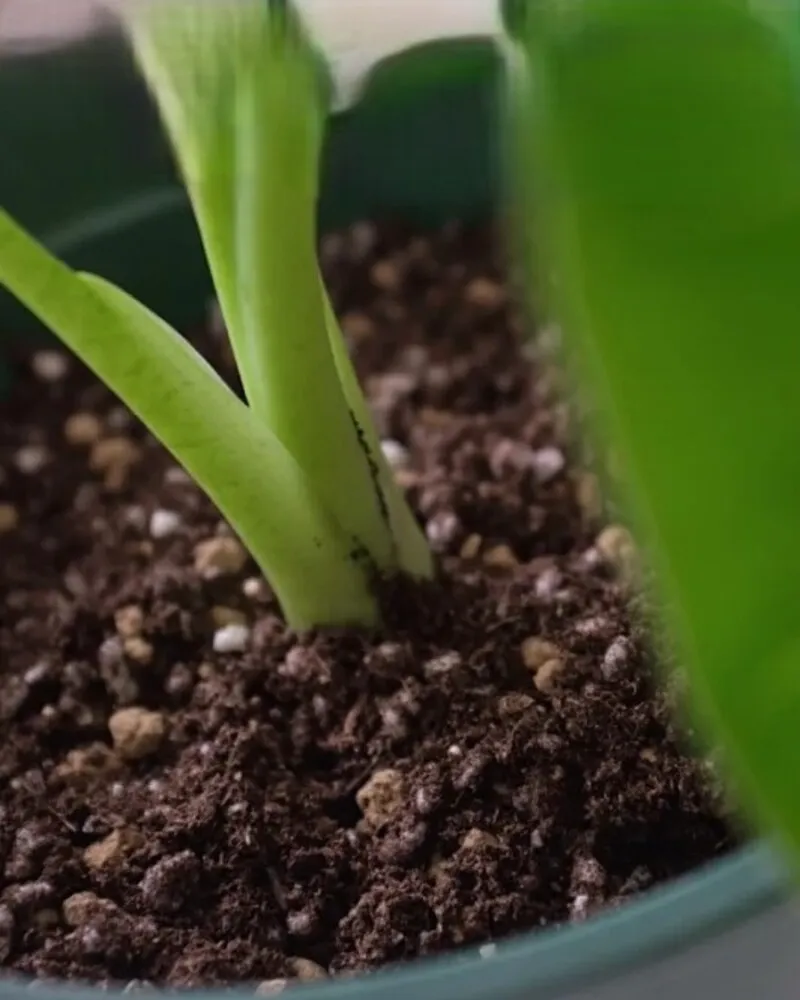
Alocasias hate being buried too deeply, especially when recovering.
When placing the plant back into the pot:
- Cover only the lower half of the root system
- Leave the stem base slightly exposed
This prevents moisture from sitting against the stem and causing stem rot.
Step 7 — Start With a Light Fungicide Watering, Then Hold Water for 7–10 Days
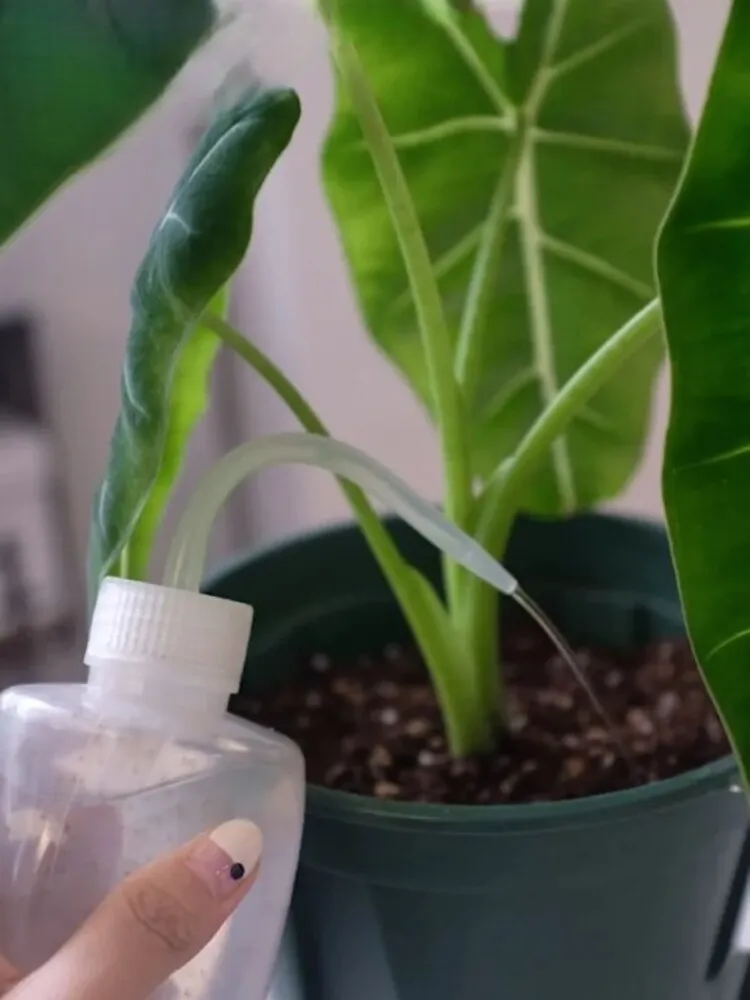
After repotting, the roots need oxygen—not a full soak.
But they do need a small amount of water to settle the mix around the root system and activate the fungicide protection.
Here’s the safest routine:
① Give a light fungicide watering
Just enough to moisten the top layer and help the roots make contact with the new soil mix—not enough to drain heavily from the bottom.
This replaces the traditional “root-settling drink” with a safer, fungicide-based version.
② Then stop watering for 7–10 days
This rest period allows:
- the cut roots to heal
- fungicide to work
- the soil to stay airy
- oxygen to reach the root zone
During this time:
- keep the plant in bright, indirect light
- avoid direct sun
- ensure gentle airflow
- maintain moderate humidity (not a sealed bag)
✔ When to water again
Once the soil surface feels completely dry and the pot feels lighter, you can resume normal—light—watering.
Real Cases From My Plants
These are the recoveries that shaped how I diagnose and treat Alocasias today. None of them were simple, and all of them taught me something that a textbook never could. This is the part of the guide that reflects true hands-on experience—the part AI can’t fabricate.
Case 1 — From a Leafless Stump to a New Shoot
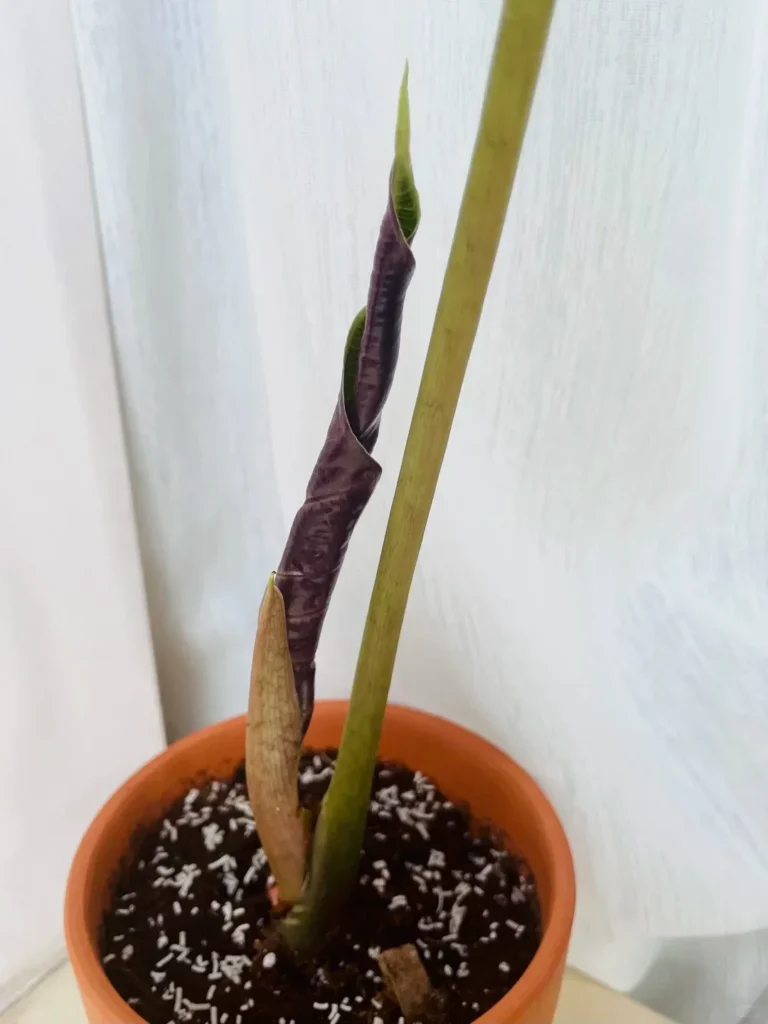
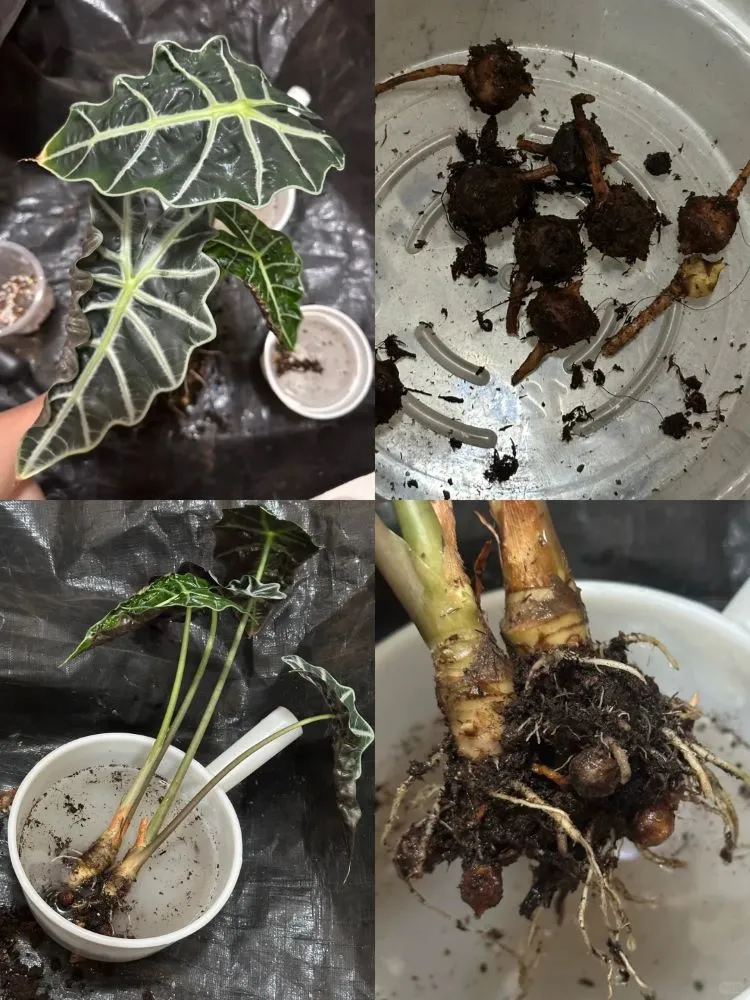
This plant arrived looking perfect, and within days every leaf had curled, softened, and collapsed. I cut everything off—literally down to a bare stump. The only reason I didn’t throw it away was because the stem still felt firm.
So I placed it in a warm corner, added a humidity tent, and left for work hoping it would survive the day.
When I came home that evening, a new shoot was already pushing up through the soil.
Later, during repotting, I found six healthy corms tucked beneath the mix, and I propagated all of them in a warm box. That moment changed the way I see “disaster plants.”
Never give up before the plant gives up.
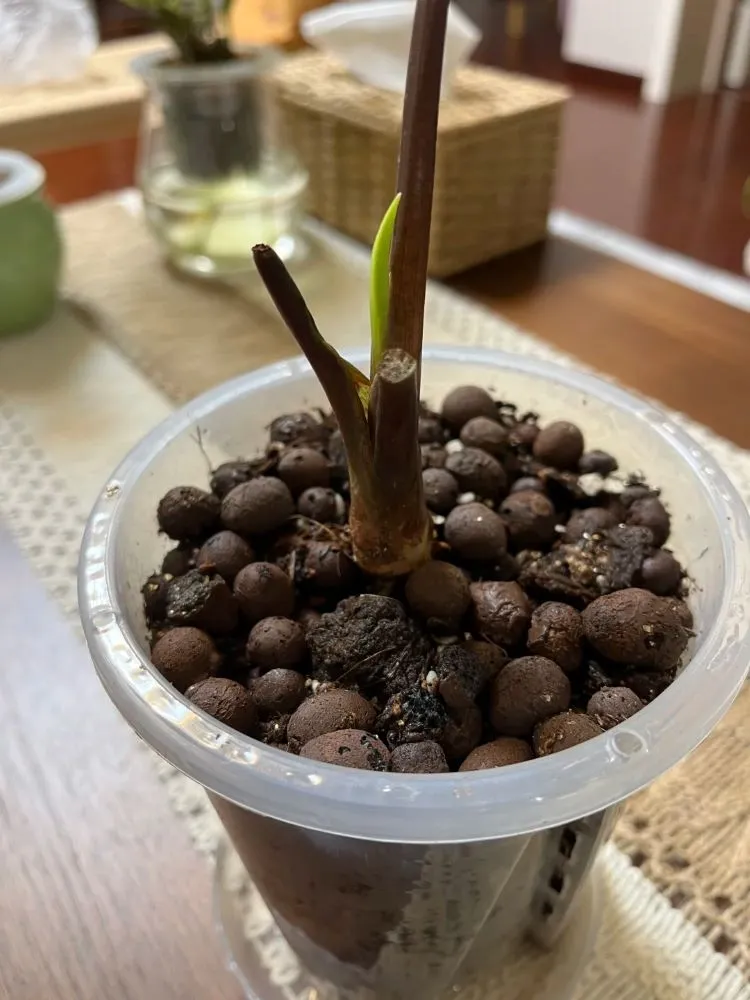
Case 2 — Dragon Scale: Saved With Semi-Hydro (LECA)
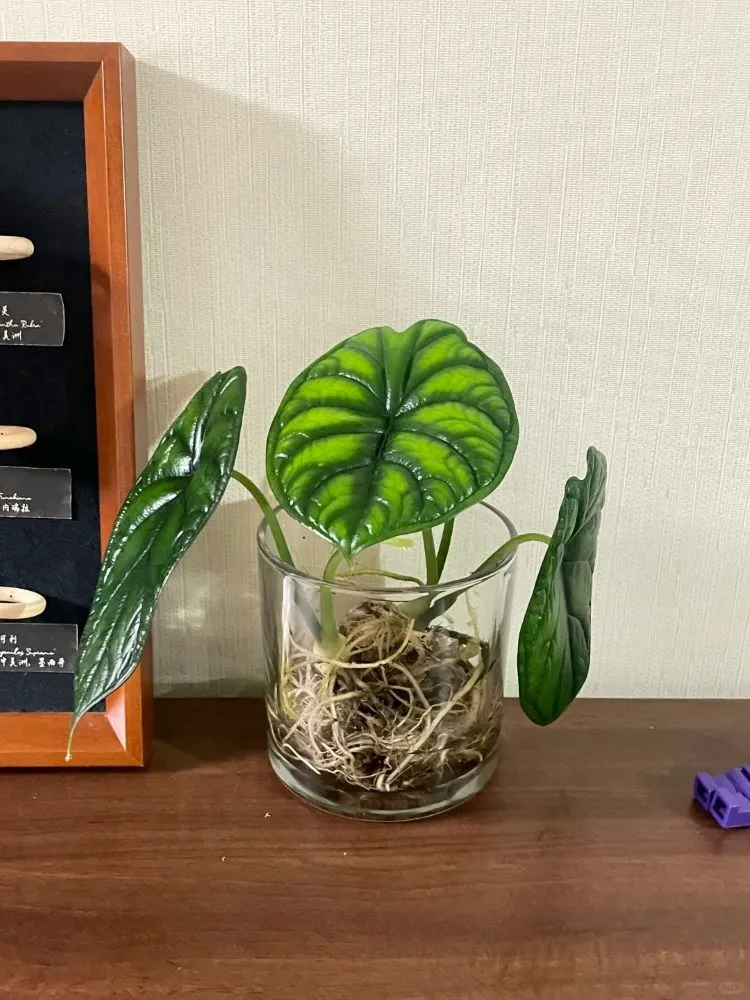
This Alocasia Dragon Scale developed severe root rot—too severe for soil. Every time I put it back into a mix, the remaining roots suffocated again. That’s when I switched to semi-hydro.
Why semi-hydro worked:
- The roots could stay oxygenated, not buried
- Moisture stayed steady, never stagnant
- LECA created a clean environment for new roots to form
What I did:
- Trimmed all rotten roots until only firm white tissue remained
- Soaked the roots in fungicide for 20 minutes
- Rinsed the LECA thoroughly to remove dust
- Placed the roots on top of the LECA, not buried
- Added water just until it barely touched the bottom of the roots
- Changed the water every 3 days for the first two weeks
- Transitioned to regular semi-hydro once new roots appeared
After almost three months, the new root system was thick, bright, and visibly stronger than the original.
This method has since become my go-to for plants that have almost no healthy roots left.
Case 3 — Waterlogging Misdiagnosed as Rot
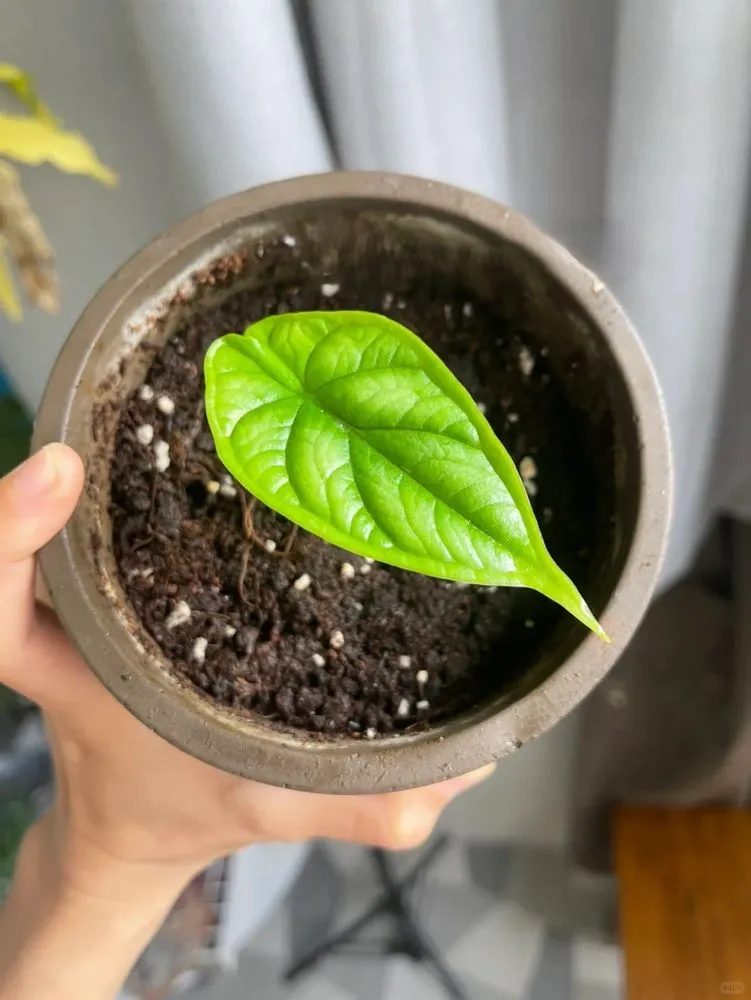
Not every sad Alocasia is rotting.
One of my plants arrived limp, curled, and pale—I was sure it had root rot. But once I unpotted it, the roots were soft but not mushy or smelly. It wasn’t rot at all; it was classic waterlogging.
Here’s what fixed it:
- I switched it into a breathable terracotta pot
- Improved airflow around the plant
- Used a looser, faster-drying soil mix
Within a week, the leaves perked up and new growth resumed. This case taught me not to panic—and not to assume everything is rot just because the leaves look tired.
Long-Term Prevention: Make Root Rot Impossible
The best way to deal with root rot is to make sure it never has a chance to start. Alocasias are incredibly resilient once you give their roots the conditions they prefer—air, warmth, and rhythm. Below is a simple, long-term routine based entirely on what has worked for my own plants over the years.
• Use airy soil
A loose, fast-draining mix keeps water moving and roots oxygenated.
• Choose breathable pots
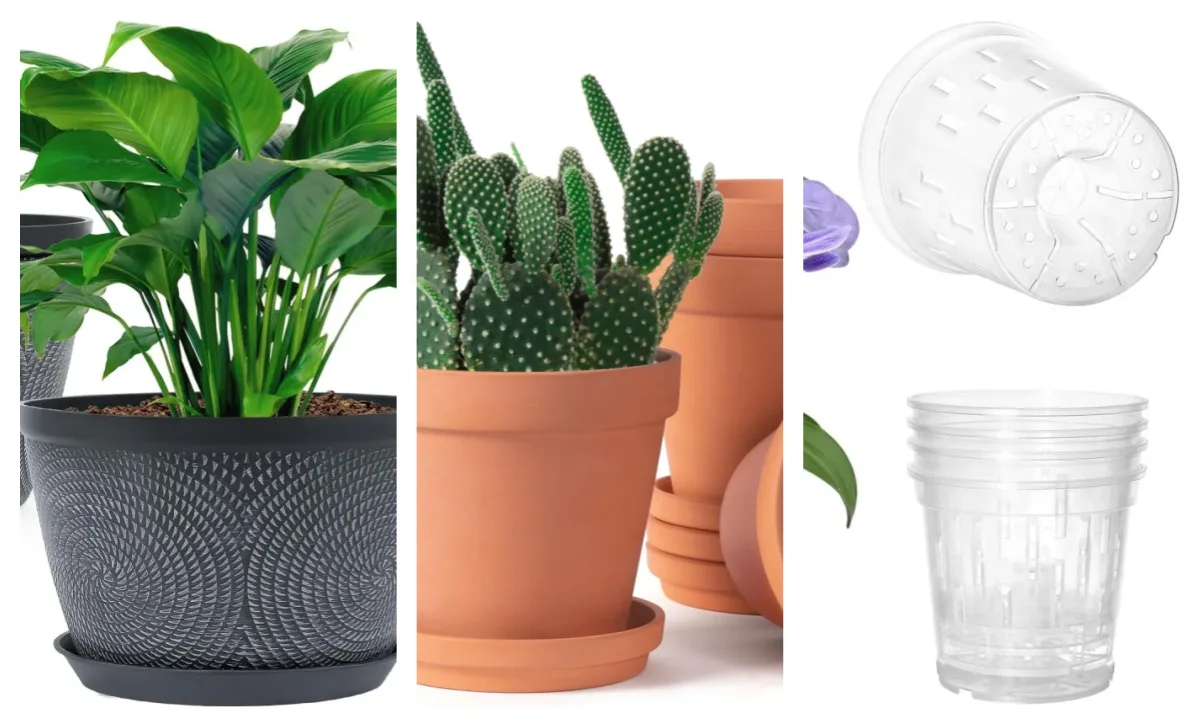
Terracotta, unglazed clay, and Net pot all help moisture evaporate naturally.
• Improve airflow
A bit of gentle air movement shortens drying time and keeps pathogens away.
• Water by season
In winter, reduce watering by 40–50%; cold soil dries slowly.
• Don’t fertilize stressed plants
Weak roots can’t absorb nutrients—feeding them increases burn + rot risk.
• Monthly root awareness check
You don’t need to unpot—just check pot weight, smell, drying speed, and drainage hole.
• Keep plants warm during recovery
Warm roots (20–25°C / 68–77°F) regrow faster and resist rot.
Rot rarely “just happens.”
It builds slowly through soil, airflow, temperature, and watering patterns.
Once you learn your plant’s rhythm and adjust these six habits, root rot becomes almost impossible.
FAQ
That’s why removing the plant from the pot immediately is more important than waiting for it to “dry out.” If your plant also has drooping stems, check that guide too.
Many Alocasias recover from just a few healthy roots or even from corms.
My ‘Polly’ pushed out a new shoot after being cut back to a stump.
Leave partially yellow leaves—Alocasia can still pull nutrients from them while rebuilding the root system.
Direct, undiluted peroxide can burn root tips. Fungicide is gentler for repeated use.esume feeding once roots are healthy and active again.
Warmth + airflow = faster recovery.
High humidity + no airflow can cause secondary rot.proving conditions — your next new leaf will show the recovery.
Trouble with your Alocasia?
Find real fixes for yellow leaves, drooping stems, and root issues in our Problems Hub.
Go to Problems Hub →